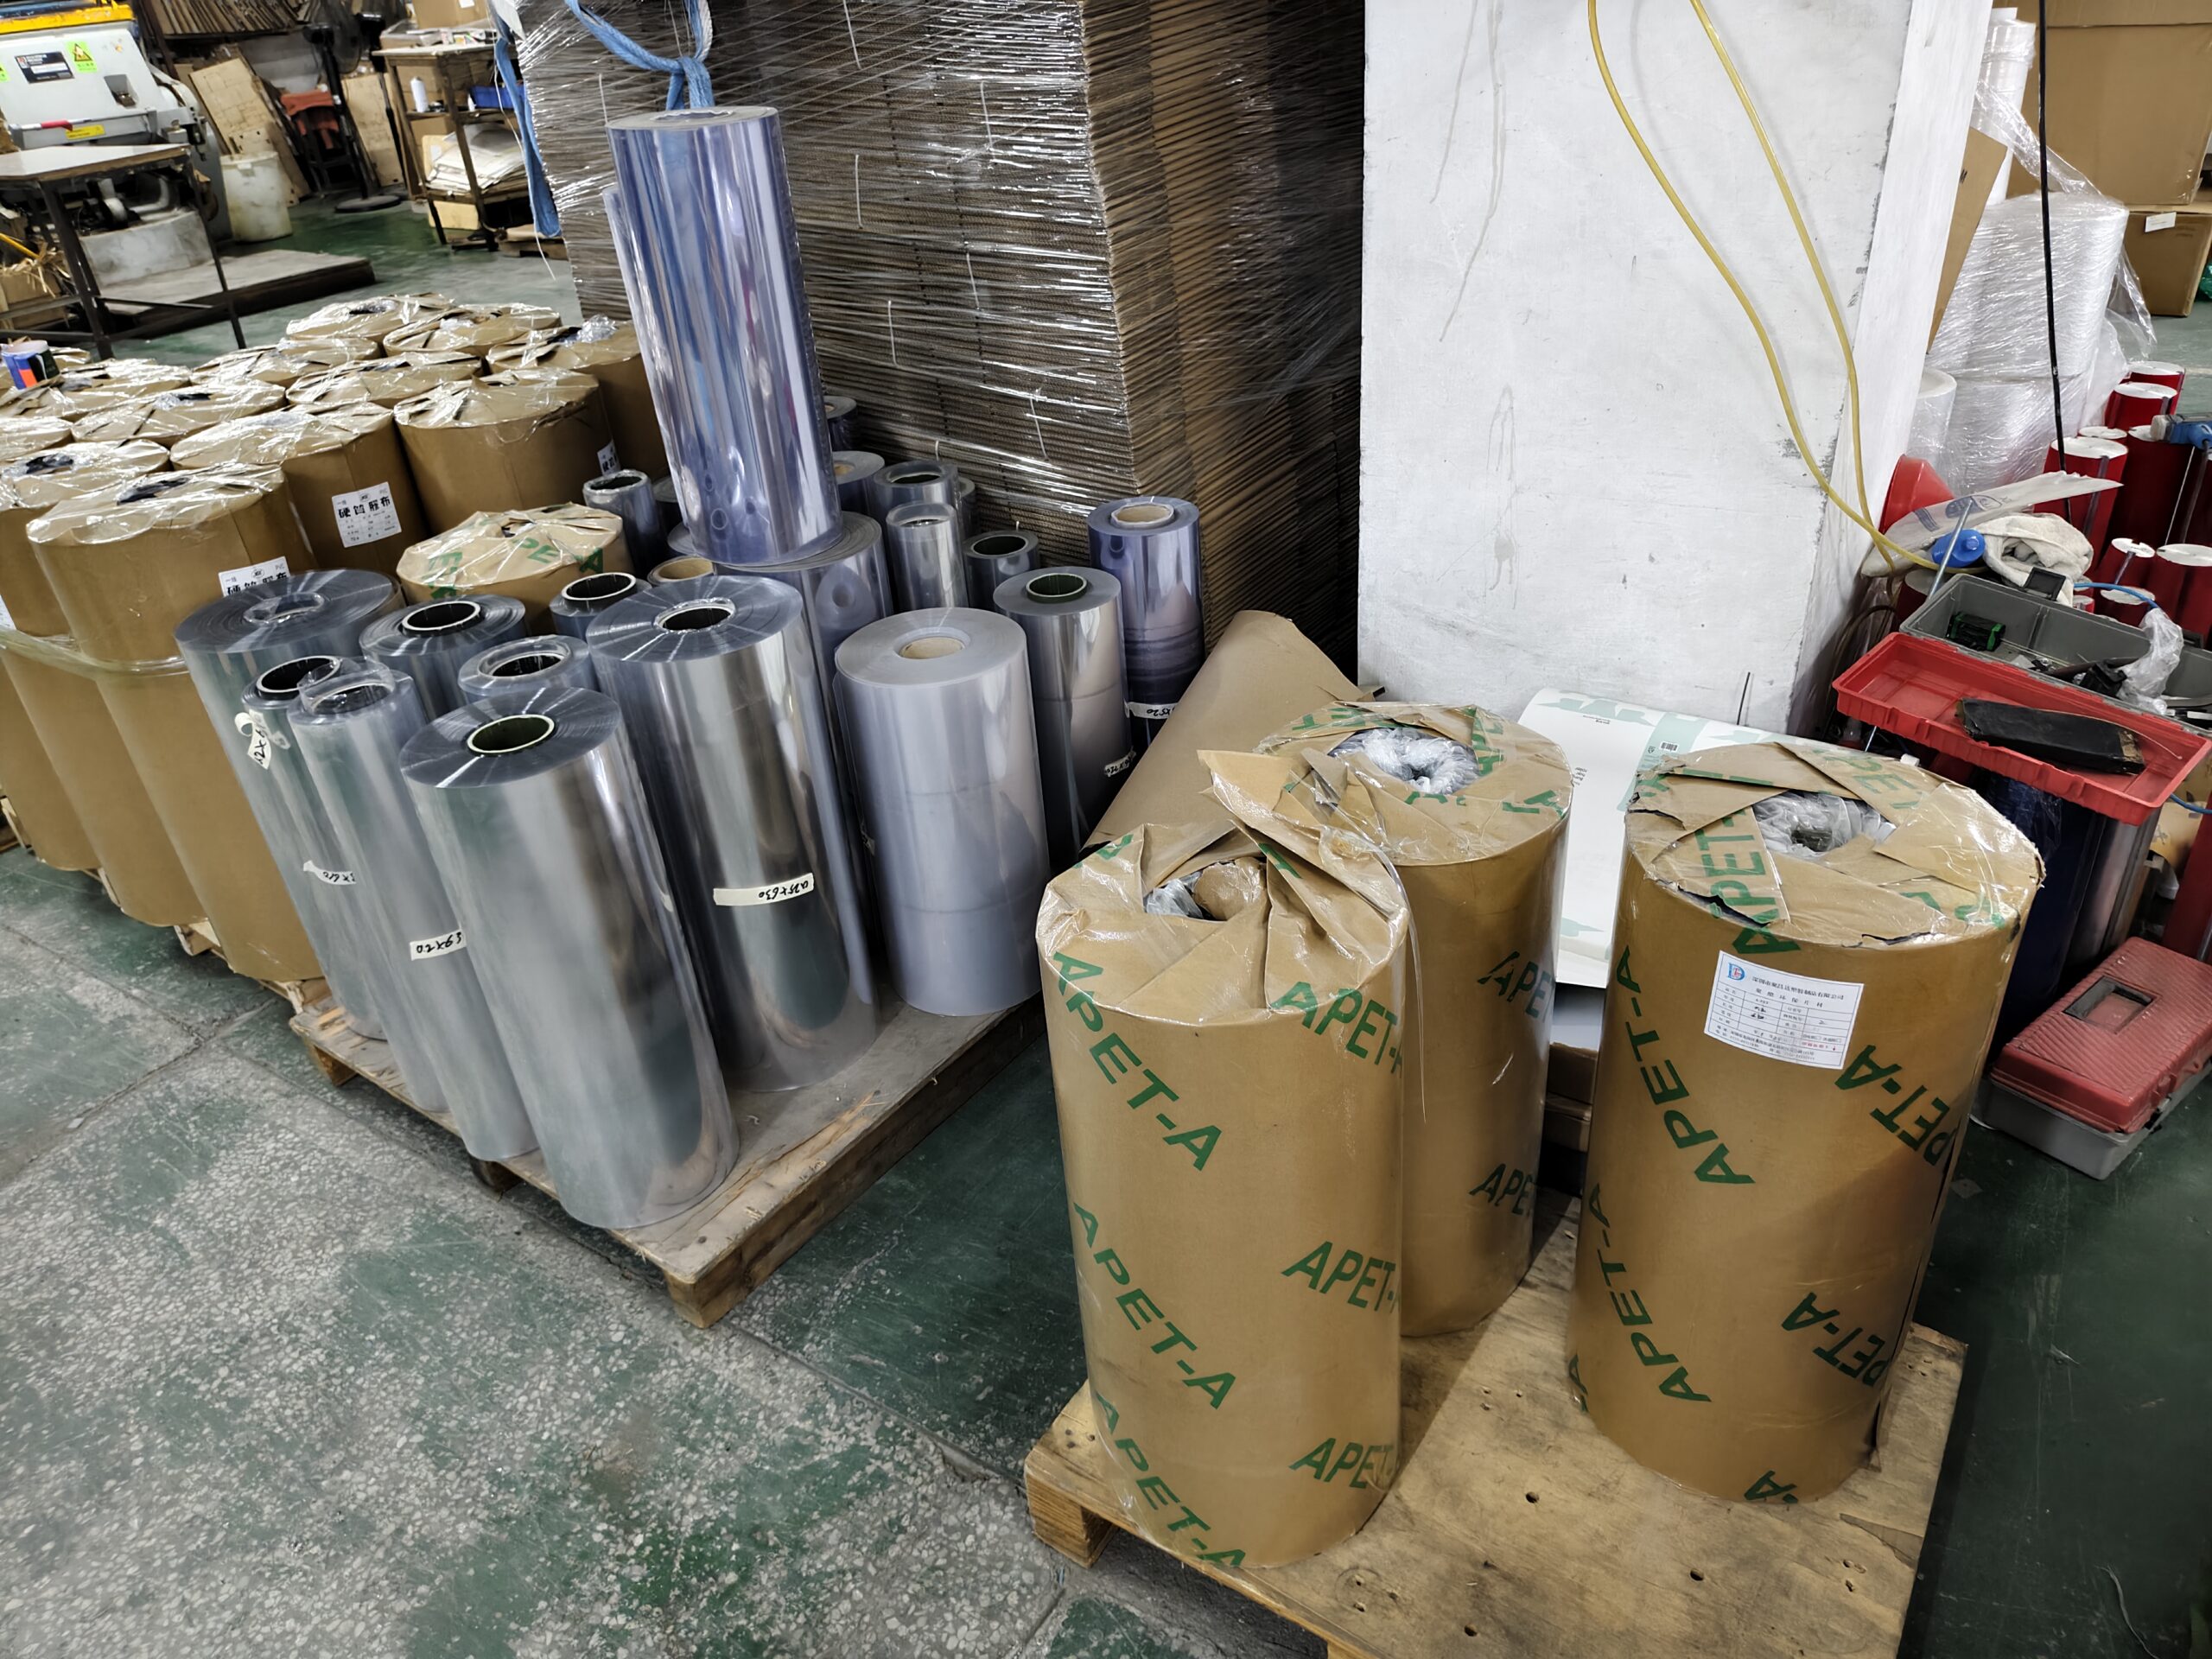
Category: General

  • PET Packaging Box Gluing: How to Prevent Weak Seams and Glue Marks

    PET Packaging Box Gluing: How to Prevent Weak Seams and Glue Marks

    PET packaging box gluing is an important production step that directly affects the strength, appearance, and reliability of a finished folding box. Even when the PET material, cutting, creasing, and printing are correct, poor bonding can still cause seams to open during packing, transportation, or retail display.

    Clear PET packaging also makes gluing quality especially important. Because the material is transparent, excessive adhesive, uneven glue lines, stains, or misaligned seams can be much more visible than on paper packaging.

    Common gluing problems include weak seams, glue overflow, visible glue marks, uneven bonding, and seams that separate after the box has been folded or filled with a product.

    These problems are usually related to several factors, including:

    • PET surface condition
    • Adhesive application
    • Glue quantity
    • Bonding position
    • Pressure during gluing
    • Curing or setting time
    • Box structure
    • Material thickness
    • Production consistency

    For custom packaging buyers, understanding these factors can help reduce quality problems before mass production and make sample approval more effective.

    In this guide, we explain how PET packaging box gluing works, why bonding problems occur, and what manufacturers can do to improve seam strength while keeping the finished box clean and transparent.

    Why PET Packaging Box Gluing Requires Careful Control

    PET has a smooth surface, which gives transparent packaging its clean and glossy appearance. However, this surface also means that the gluing process must be properly controlled.

    A strong seam depends not only on the adhesive itself but also on how accurately the glue is applied and how well the two bonding surfaces are positioned.

    If too little adhesive is applied, the seam may not have enough bonding strength. If too much adhesive is used, glue may spread outside the bonding area and become visible through the transparent PET.

    The box structure also matters. A narrow glue flap, incorrect crease position, or excessive tension after folding can place additional stress on the bonded seam.

    For this reason, manufacturers normally evaluate gluing together with:

    • Box dimensions
    • PET thickness
    • Glue flap width
    • Folding direction
    • Product weight
    • Final box shape
    • Required seam strength
    • Appearance requirements

    The goal is not simply to use more adhesive. The goal is to create a clean, consistent bond that remains strong after folding, assembly, packing, and transportation.

    Common Causes of Weak PET Box Seams

    Weak seams are one of the most common problems in PET packaging box gluing. A seam may look acceptable immediately after production but begin to open later during folding, packing, storage, or transportation.

    Several factors can reduce bonding strength.

    Insufficient Adhesive

    If too little glue is applied, the bonding area may not have enough adhesive coverage to create a stable seam.

    This problem is more likely to occur when:

    • The glue line is too narrow
    • Adhesive application is inconsistent
    • Machine settings are unstable
    • The glue flap is too small
    • Production speed is too high for proper bonding

    A weak seam may not separate immediately. In some cases, the box only opens after it has been assembled or placed under tension.

    Incorrect Adhesive Application

    Even when the correct amount of adhesive is used, inaccurate positioning can still cause bonding problems.

    The glue should stay within the intended bonding area. If it is applied too close to the edge, part of the adhesive may squeeze outward and leave visible marks.

    If the glue line is positioned too far from the edge, the effective bonding area may become too small.

    Consistent glue placement is therefore important for both seam strength and appearance.

    Dust, Oil, or Surface Contamination

    PET surfaces should be clean before bonding.

    Dust, oil, release agents, fingerprints, or other contamination can reduce the contact between the adhesive and the PET surface.

    This can lead to:

    • Partial bonding
    • Uneven seam strength
    • Localized seam opening
    • Adhesive separation
    • Visible defects around the glue area

    For clear packaging, surface cleanliness is especially important because contamination may also remain visible after the box is finished.

    Incorrect Pressure During Bonding

    After adhesive is applied, the bonding surfaces need enough pressure to remain in proper contact.

    If the pressure is too low, the adhesive may not spread evenly across the bonding surface.

    If the pressure is uneven, some areas of the seam may bond correctly while others remain weak.

    Manufacturers therefore need to control:

    • Pressure level
    • Contact position
    • Alignment
    • Pressing time
    • Production speed

    A stable gluing process should produce a seam that is both visually clean and mechanically reliable.

    Why Glue Marks Appear on Clear PET Packaging

    Clear PET packaging shows surface defects very easily. Even a small amount of excess adhesive can become visible through the transparent material, especially under retail lighting.

    Glue marks usually appear for several reasons.

    Too Much Adhesive

    Applying too much glue may cause the adhesive to squeeze out from the seam when pressure is applied.

    This can leave visible residue along the edge of the box and reduce the clean appearance of transparent packaging.

    Using more adhesive does not necessarily create a stronger bond. The amount should match the glue flap width, PET thickness, and bonding area.

    Glue Applied Too Close to the Edge

    If the glue line is positioned too close to the outer edge of the flap, pressure during bonding can push adhesive outside the intended area.

    This is especially noticeable on clear PET boxes because the seam is visible from both inside and outside the package.

    Proper glue-line positioning helps keep the bonding area clean while maintaining enough adhesive coverage.

    Uneven Glue Application

    An inconsistent glue line can create both cosmetic and structural problems.

    Some areas may receive too much adhesive and show visible marks, while other areas may receive too little and become weak.

    Stable machine adjustment and regular inspection are important when producing larger quantities.

    Adhesive Contamination During Handling

    Glue can also be transferred to other parts of the PET surface during production, stacking, or manual handling.

    Once adhesive touches a visible transparent panel, it may be difficult to remove without leaving a mark or affecting surface clarity.

    Clean working surfaces and careful handling help reduce this risk.

    Incorrect Pressure or Alignment

    If the glue flap is not aligned correctly before pressure is applied, adhesive may spread beyond the bonding area.

    Uneven pressure can also create irregular glue marks or visible bonding lines.

    For transparent packaging, operators should check both seam strength and appearance during production rather than inspecting only whether the box remains closed.

    How to Reduce Visible Glue Marks

    To keep clear PET packaging clean, manufacturers should control several points:

    • Use the correct amount of adhesive
    • Keep the glue line inside the bonding area
    • Maintain consistent glue application
    • Check flap alignment before bonding
    • Avoid excessive pressure
    • Keep PET surfaces and equipment clean
    • Inspect transparent panels for adhesive residue
    • Test the finished seam before mass production

    The ideal result is a strong seam with minimal visible adhesive, especially when the package is designed to display the product clearly.

    How to Improve PET Packaging Box Gluing Quality

    A reliable PET packaging box gluing process depends on controlling several production details together. Improving only one factor may not solve the problem if other parts of the process remain unstable.

    Confirm the Correct Adhesive

    The adhesive should be suitable for PET material and the intended production method.

    Different adhesives have different bonding strength, drying speed, viscosity, and appearance after curing. For clear packaging, the final appearance is especially important because excess glue or cloudy residue may remain visible through the box.

    Before mass production, manufacturers should test the adhesive on the actual PET material rather than relying only on general specifications.

    Control the Glue Amount

    Too little adhesive may cause weak seams, while too much adhesive may create visible residue.

    The correct glue amount should provide full bonding coverage without squeezing out from the seam.

    Manufacturers should adjust the glue application according to:

    • PET thickness
    • Glue flap width
    • Box size
    • Production speed
    • Required seam strength
    • Adhesive viscosity

    The goal is consistency rather than simply applying more glue.

    Maintain Accurate Glue-Line Position

    The glue line should remain inside the intended bonding area.

    If the position shifts during production, part of the adhesive may move outside the glue flap or fail to cover the bonding area completely.

    Accurate positioning helps improve both seam strength and appearance.

    For clear PET packaging, this is especially important because misaligned glue lines can be visible from outside the box.

    Control Folding and Pressing

    After adhesive is applied, the glue flap must be folded and pressed in the correct position.

    During this stage, manufacturers should check:

    • Flap alignment
    • Folding angle
    • Pressing pressure
    • Pressing time
    • Box squareness
    • Seam position

    If the box is pressed before the panels are properly aligned, the seam may become crooked or uneven.

    Inspect the Seam During Production

    Quality inspection should not be limited to the final stage.

    Operators should regularly check samples during production for:

    • Weak bonding
    • Open seams
    • Excess glue
    • Visible glue marks
    • Misalignment
    • Surface contamination
    • Uneven folding

    Finding a problem early can prevent a large quantity of defective boxes from being produced.

    Test the Finished Box With the Actual Product

    A glued seam may appear acceptable when the box is empty but behave differently after the product is packed inside.

    The finished box should therefore be tested with the actual product whenever possible.

    Manufacturers should check whether the seam remains stable during:

    • Product insertion
    • Folding
    • Stacking
    • Packing
    • Transportation
    • Retail handling

    This gives a more realistic evaluation of the final packaging performance.

    Common PET Packaging Box Gluing Problems and Solutions

    Weak or Open Seams

    Weak seams are one of the most common problems in PET packaging box gluing.

    Possible causes include:

    • Insufficient adhesive
    • Incorrect adhesive type
    • Low pressing pressure
    • Short pressing time
    • Dust or contamination on the PET surface
    • Poor glue flap contact
    • Incorrect flap alignment

    To solve the problem, manufacturers should first identify whether the issue comes from the adhesive, the PET surface, or the bonding process.

    Simply adding more glue is not always the correct solution. Excess adhesive may improve coverage but can also create visible glue marks and longer curing times.

    Visible Glue Marks

    Glue marks are especially noticeable on transparent PET packaging because the packaging itself is designed to display the product clearly.

    Common causes include:

    • Excess adhesive
    • Glue squeezed outside the bonding area
    • Incorrect glue-line position
    • Excessive pressing pressure
    • Adhesive with poor transparency after curing
    • Contaminated tools or surfaces

    The best solution is to control the glue amount and keep the adhesive within the intended bonding area.

    For clear retail packaging, both seam strength and appearance should be checked during production.

    Crooked or Misaligned Seams

    A seam may be strong but still appear defective if the glue flap is not aligned correctly.

    Misalignment can affect:

    • Box shape
    • Folding accuracy
    • Product fit
    • Visual appearance
    • Stacking performance

    Possible causes include inaccurate creasing, unstable folding, incorrect positioning, or movement during pressing.

    Manufacturers should check whether the crease lines, glue flap, and pressing position remain consistent throughout production.

    Glue Leakage

    Glue leakage occurs when adhesive is squeezed outside the bonding area.

    This may happen when too much adhesive is applied or when excessive pressure is used during bonding.

    Glue leakage can leave visible residue on transparent PET panels and may also contaminate nearby boxes during packing.

    To reduce this problem:

    • Reduce excessive adhesive
    • Adjust pressure
    • Check the glue-line position
    • Keep the bonding surface flat
    • Inspect samples regularly during production

    Seam Opens After Folding

    Sometimes a seam appears strong immediately after gluing but opens later when the box is folded or assembled.

    This may indicate that the adhesive has not fully cured, the PET surface is difficult to bond, or the seam is under excessive mechanical stress.

    The finished box should therefore be tested after folding rather than checking the seam only while the box remains flat.

    Seam Opens After Packing

    A box may also pass production inspection but fail after the actual product is inserted.

    This usually means the packaging structure or seam strength does not match the real product load.

    Manufacturers should test the box with the actual product weight and packing method before mass production whenever possible.

    PET Packaging Box Gluing Quality Checklist

    Before mass production, manufacturers should confirm that the gluing process is stable and suitable for the final packaging application.

    A practical quality checklist includes:

    • Glue flap position is correct
    • Adhesive amount is consistent
    • Glue remains inside the bonding area
    • Seam alignment is accurate
    • Bonding pressure is stable
    • Pressing time is sufficient
    • No visible glue leakage
    • Transparent panels remain clean
    • No obvious glue marks appear on the box surface
    • The seam remains closed after folding
    • The seam remains stable after product insertion
    • The finished box maintains its correct shape
    • Bonding strength is consistent across multiple samples
    • Packed boxes remain stable during stacking and transportation

    For transparent PET packaging, visual inspection is especially important because even small adhesive marks may affect the appearance of the final package.

    Manufacturers should not evaluate gluing quality only by pulling the seam by hand. The box should also be folded, assembled, packed with the actual product when possible, and checked under realistic handling conditions.

    Final Thoughts

    PET packaging box gluing may look like a simple production step, but it directly affects box strength, appearance, assembly performance, and customer experience.

    Weak seams can cause boxes to open during packing or transportation, while excessive adhesive can leave visible marks on transparent surfaces.

    Good PET packaging box gluing quality depends on several factors working together, including the box structure, PET material, glue flap design, adhesive application, pressing conditions, and final inspection.

    For buyers, the most important point is to confirm both seam strength and visual appearance before mass production.

    A well-controlled gluing process helps ensure that custom PET packaging boxes remain clean, stable, and reliable from production to final retail display.
  • How Are Custom PET Packaging Boxes Made? A Complete Manufacturing Process

    How Are Custom PET Packaging Boxes Made? A Complete Manufacturing Process

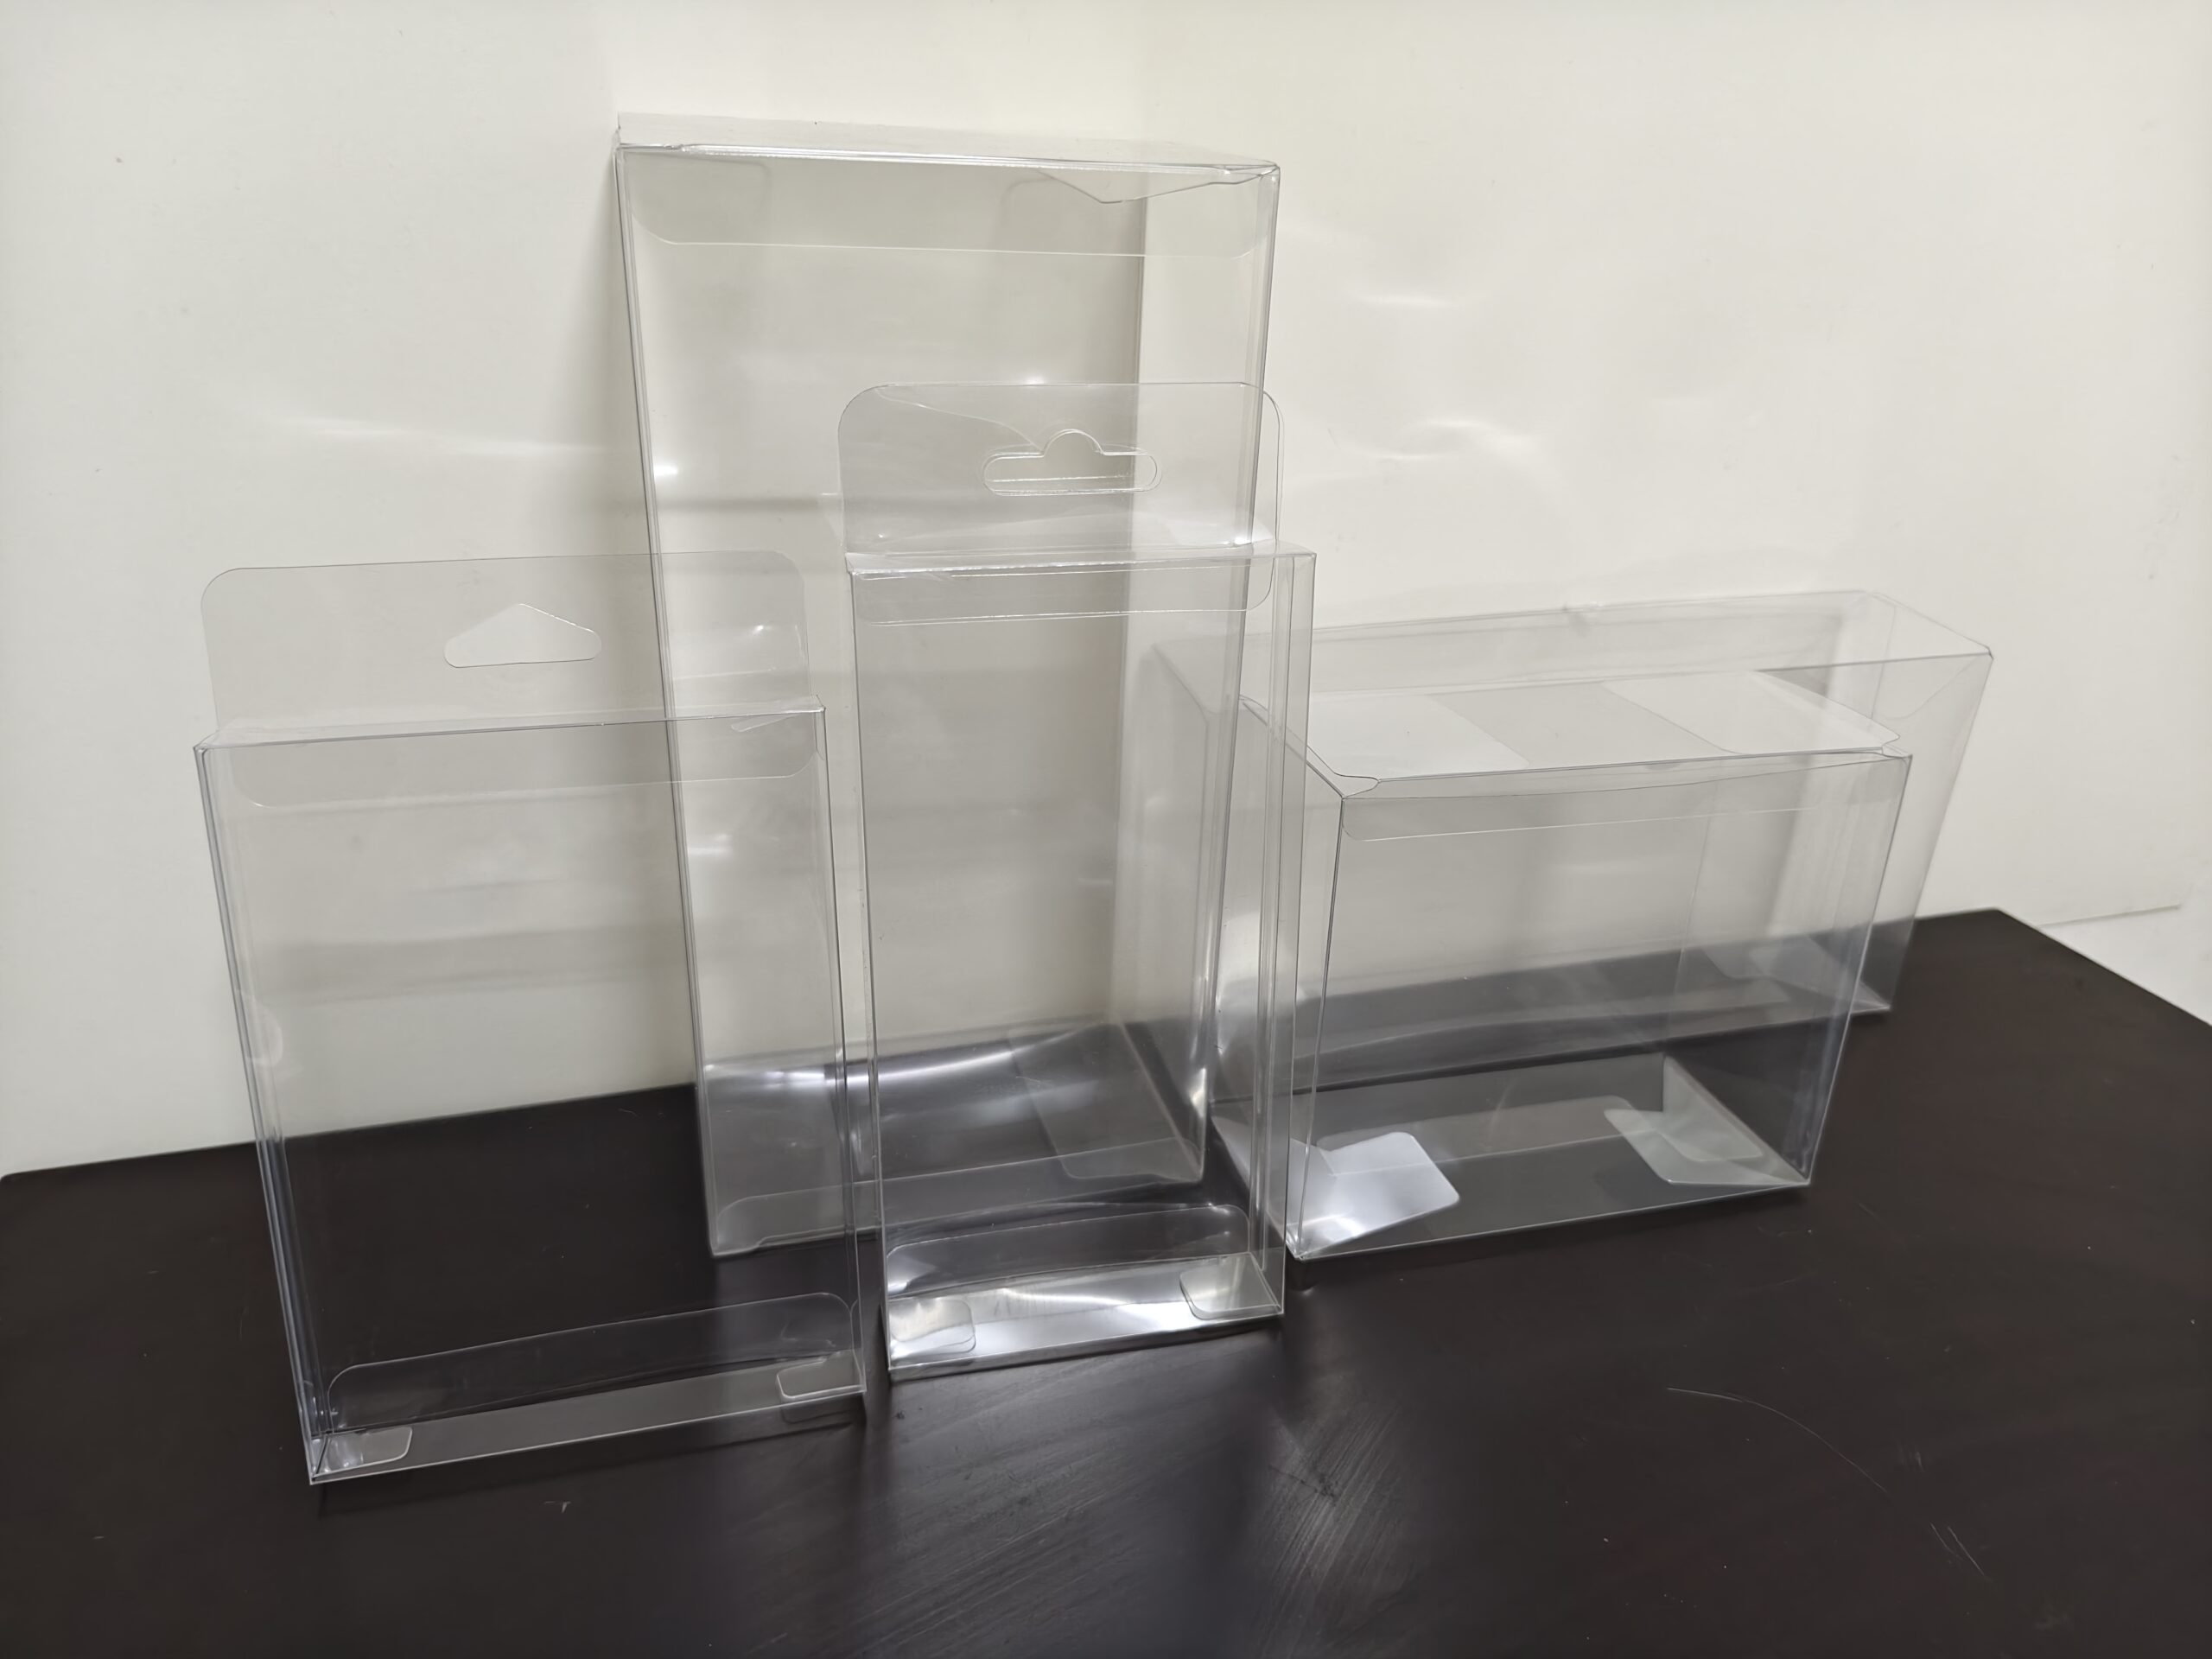
    Custom PET packaging boxes are widely used for products that require clear visibility, lightweight protection, and an attractive presentation. From phone accessories and cosmetics to toys and gift products, PET boxes help brands display their products while protecting them during storage and transportation.

    Many buyers only see the finished packaging, but a custom PET packaging box involves several production steps before it is ready for shipment. The manufacturing process includes material selection, structural design, cutting, creasing, folding, quality inspection, and final packing.

    Understanding the PET packaging box manufacturing process helps buyers communicate better with suppliers, avoid unnecessary costs, and choose the right packaging solution for their products.

    Material Selection for PET Packaging Boxes

    The first step in manufacturing custom PET packaging boxes is selecting the right PET sheet material.

    PET (Polyethylene Terephthalate) is commonly chosen for transparent packaging because it provides excellent clarity, good strength, and a clean appearance. The transparency allows customers to see the product inside without opening the package, making it suitable for retail displays.

    Before production begins, manufacturers usually confirm several material details:

    • PET sheet thickness
    • Box size and dimensions
    • Required transparency
    • Product weight and protection requirements
    • Printing or finishing requirements

    The thickness of the PET sheet should match the actual product requirements. Using material that is too thin may affect box strength, while excessive thickness can increase material costs and shipping weight.

    A professional manufacturer will recommend a suitable PET thickness based on the box structure, product weight, and final application.

    Confirming Box Design and Specifications

    After selecting the material, the next step is confirming the box design.

    Custom PET packaging boxes are usually produced according to the customer’s product dimensions and packaging requirements. Before mass production, manufacturers need to confirm important details including:

    • Product dimensions
    • Box structure
    • Folding method
    • Printing artwork
    • Transparent window areas
    • Assembly requirements

    For customers who already have packaging drawings, manufacturers can produce according to the provided design. If customers only have product samples or basic requirements, experienced suppliers can help create a suitable box structure.

    The design stage is important because incorrect dimensions or unnecessary structural complexity can increase production costs and affect the final packaging performance.

    A well-designed PET box should provide enough protection while remaining easy to assemble and efficient for shipping.

    PET Sheet Cutting Process

    Once the design is confirmed, production starts with cutting the PET sheet.

    PET packaging box manufacturers cut large PET sheets or rolls into the required sizes according to the box design. Accurate cutting is important because small errors may affect folding accuracy and the final appearance of the box.

    During this process, manufacturers pay attention to:

    • Cutting dimensions
    • Edge quality
    • Material utilization
    • Production consistency

    Proper material planning can also help reduce waste and control packaging costs.

    For custom orders with multiple sizes or designs, manufacturers organize cutting plans carefully to maintain production efficiency and consistent quality.

    Creasing and Folding Line Formation

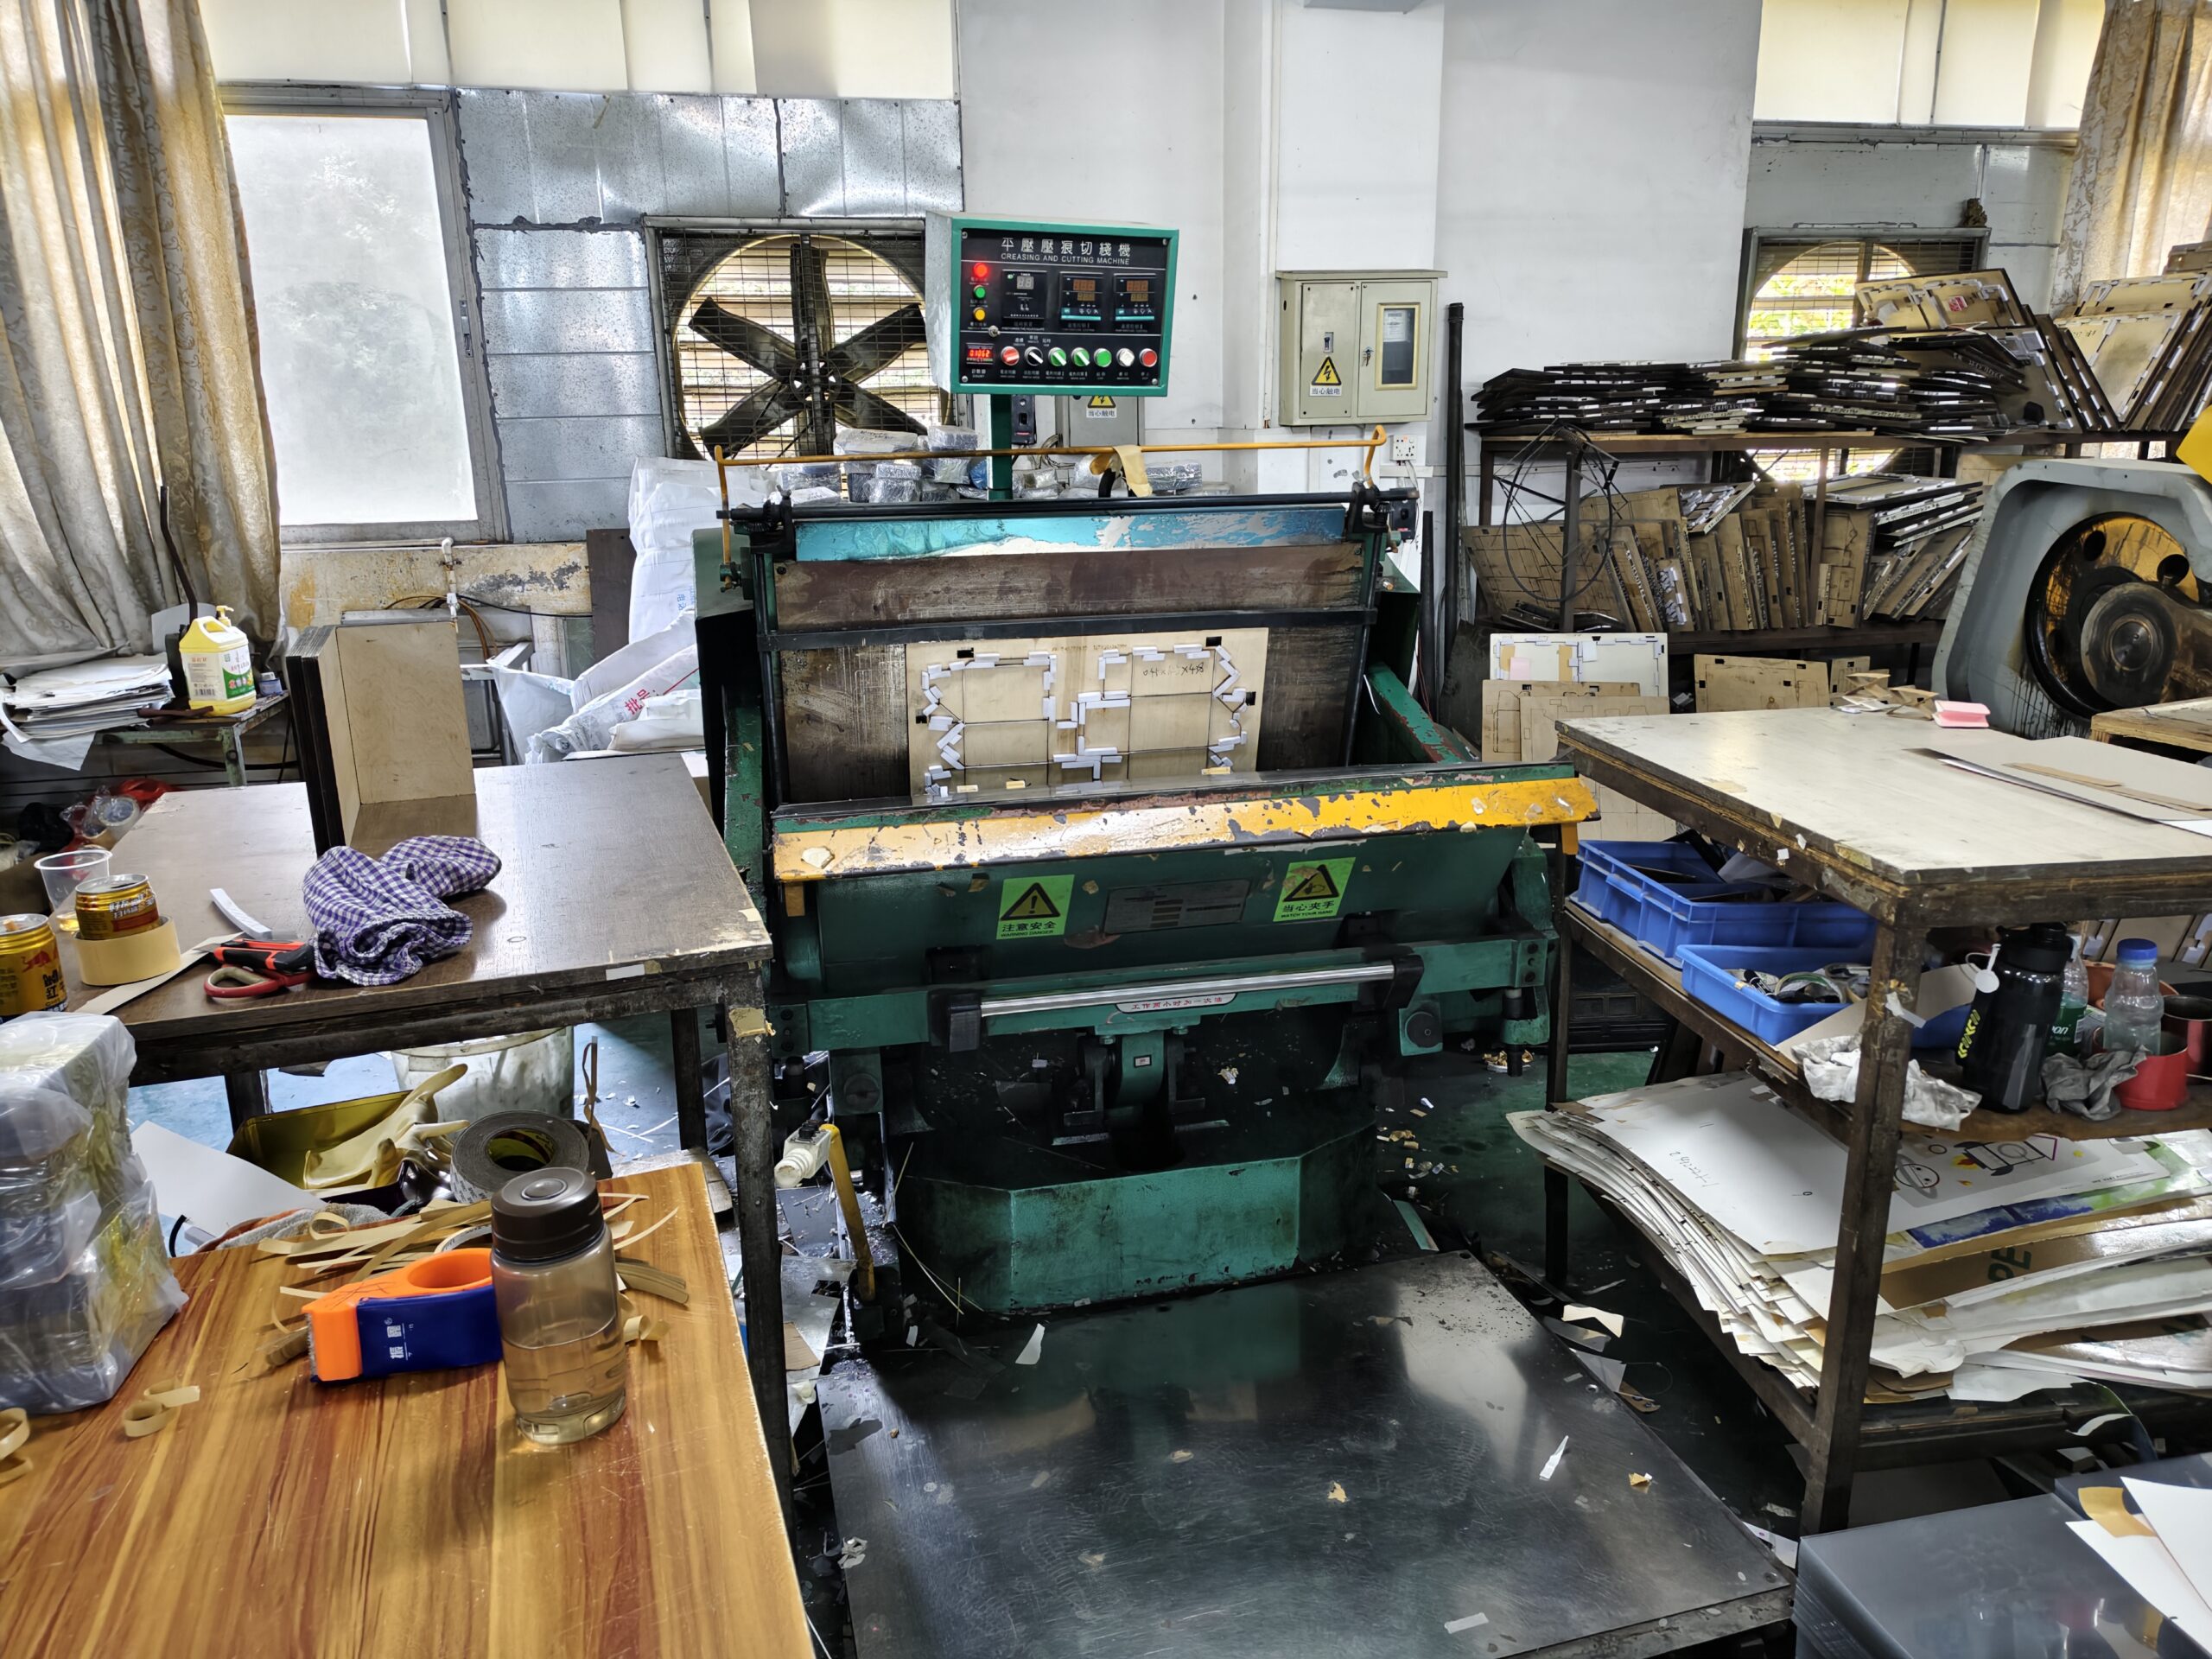
    After the PET sheet is cut into the correct size, the next step is creating folding lines.

    Creasing is an important process in PET packaging box manufacturing because it determines how accurately the box can be folded and assembled.

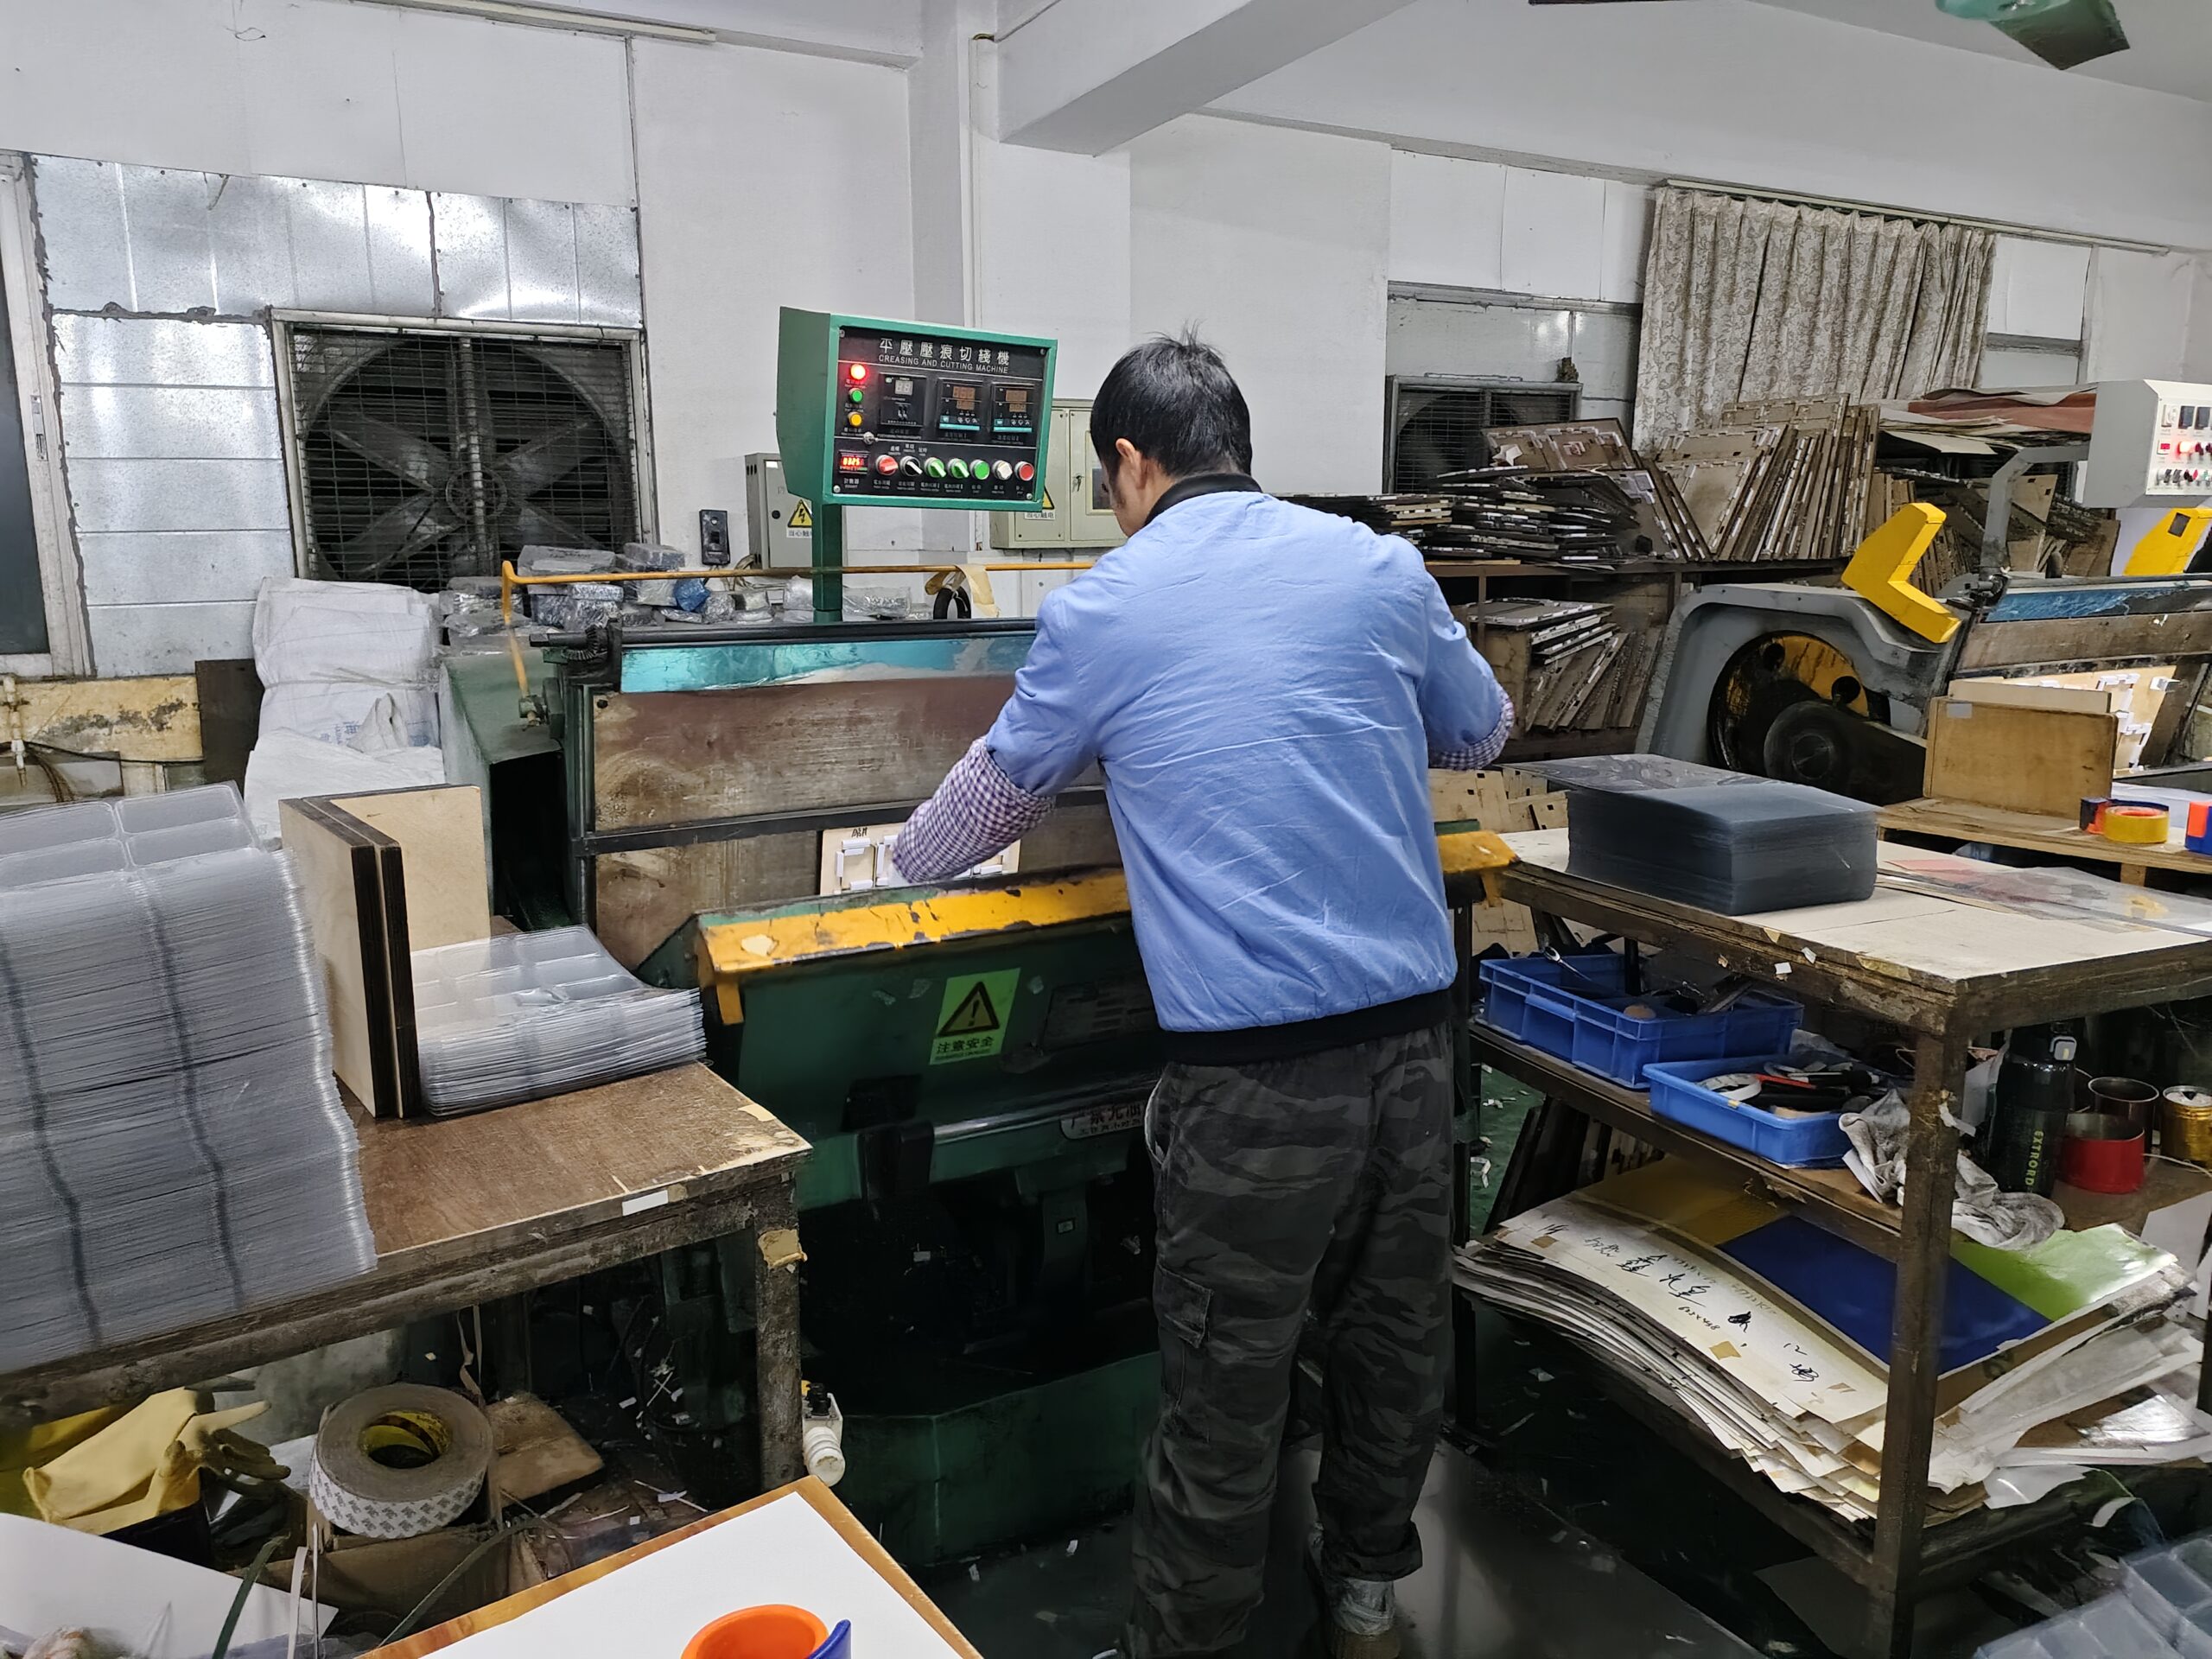
    During production, manufacturers use creasing equipment to create precise folding marks on the PET sheet according to the box structure.

    The creasing process needs to balance several factors:

    • Folding accuracy
    • Line position consistency
    • Material thickness
    • Final box appearance

    If the creasing lines are not accurate, the finished box may have uneven edges, incorrect angles, or difficulty during assembly.

    For transparent PET boxes, clean and accurate folding lines are especially important because customers can easily see the overall appearance of the packaging.

    A professional manufacturer will adjust the creasing pressure according to the PET thickness and box design to achieve smooth folding without damaging the material.

    Folding and Box Assembly

    After creasing, the PET sheet moves to the folding stage.

    Unlike rigid plastic containers, PET folding boxes are produced from flat sheets and formed into three-dimensional packaging through folding and assembly.

    During this process, manufacturers complete steps such as:

    • Folding the box panels
    • Checking the structure
    • Applying adhesive when required
    • Preparing finished flat-packed boxes

    The advantage of PET folding boxes is that they can be shipped and stored efficiently before final assembly. This helps reduce transportation volume and storage space compared with many traditional packaging solutions.

    For custom orders, manufacturers also need to confirm whether customers require:

    • Flat-packed boxes
    • Pre-assembled boxes
    • Automatic bottom structures
    • Special locking designs

    Choosing the right structure can improve packaging efficiency and reduce unnecessary labor costs.

    Printing and Surface Finishing (Optional)

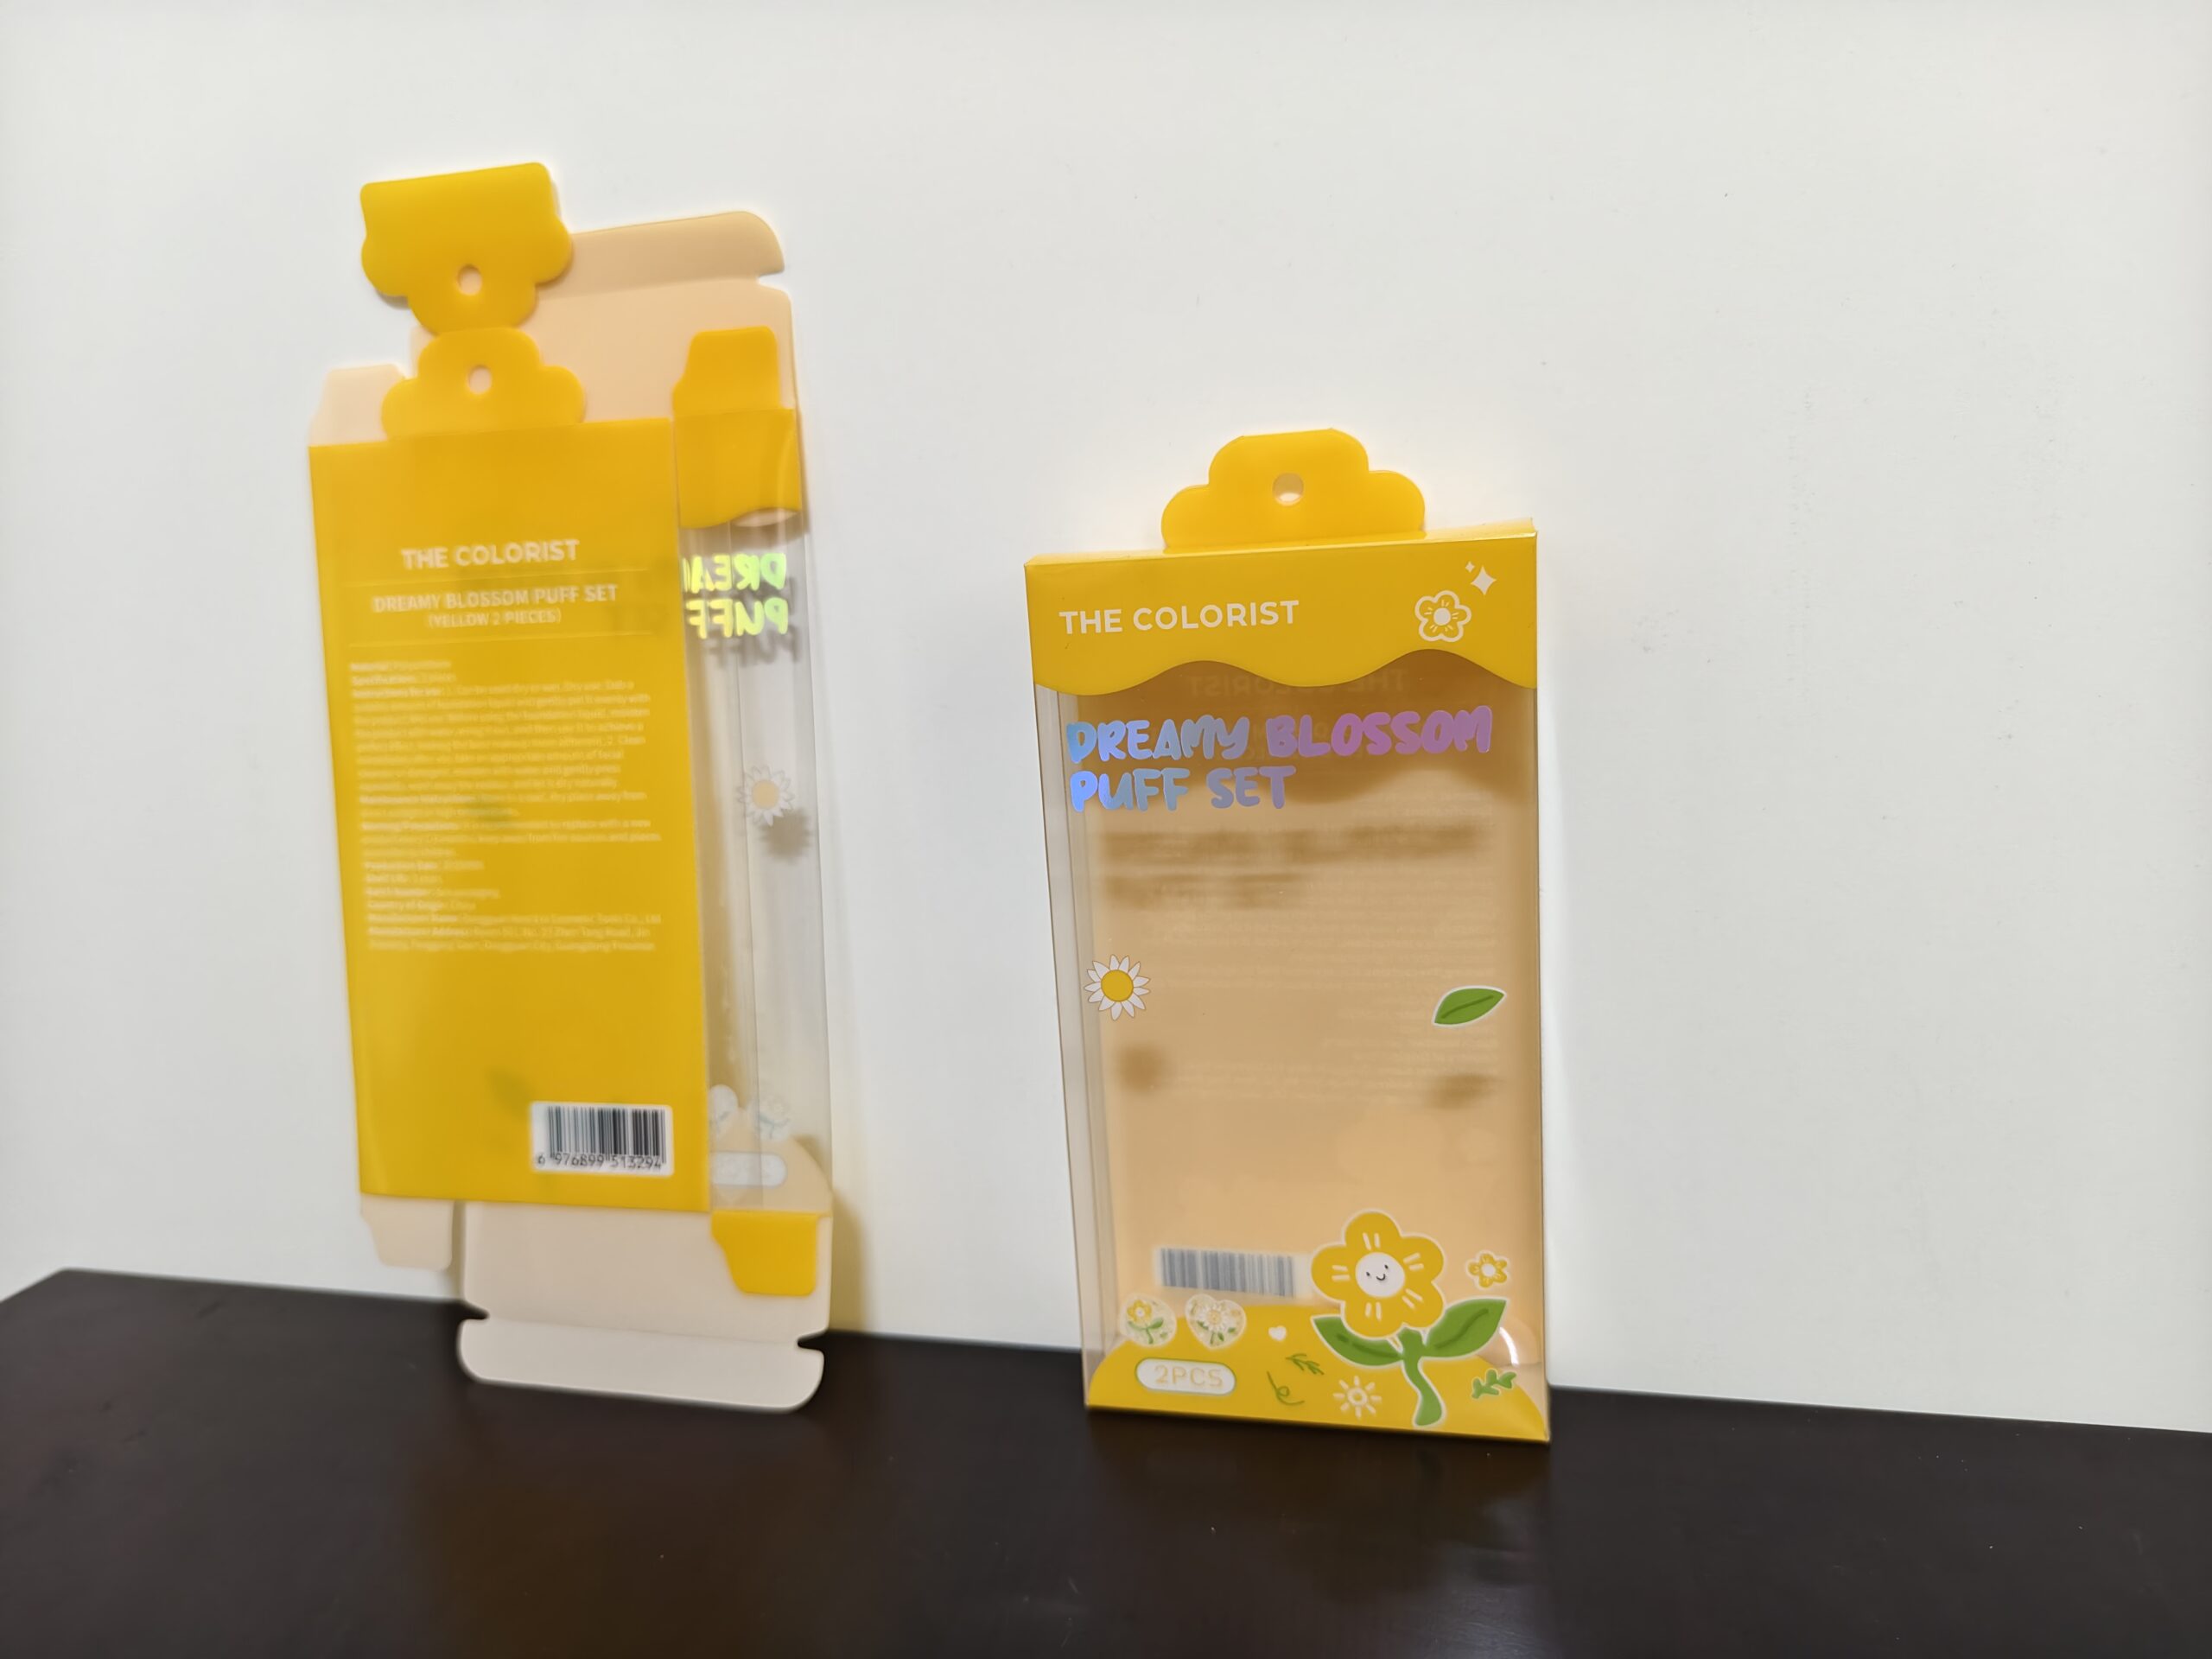
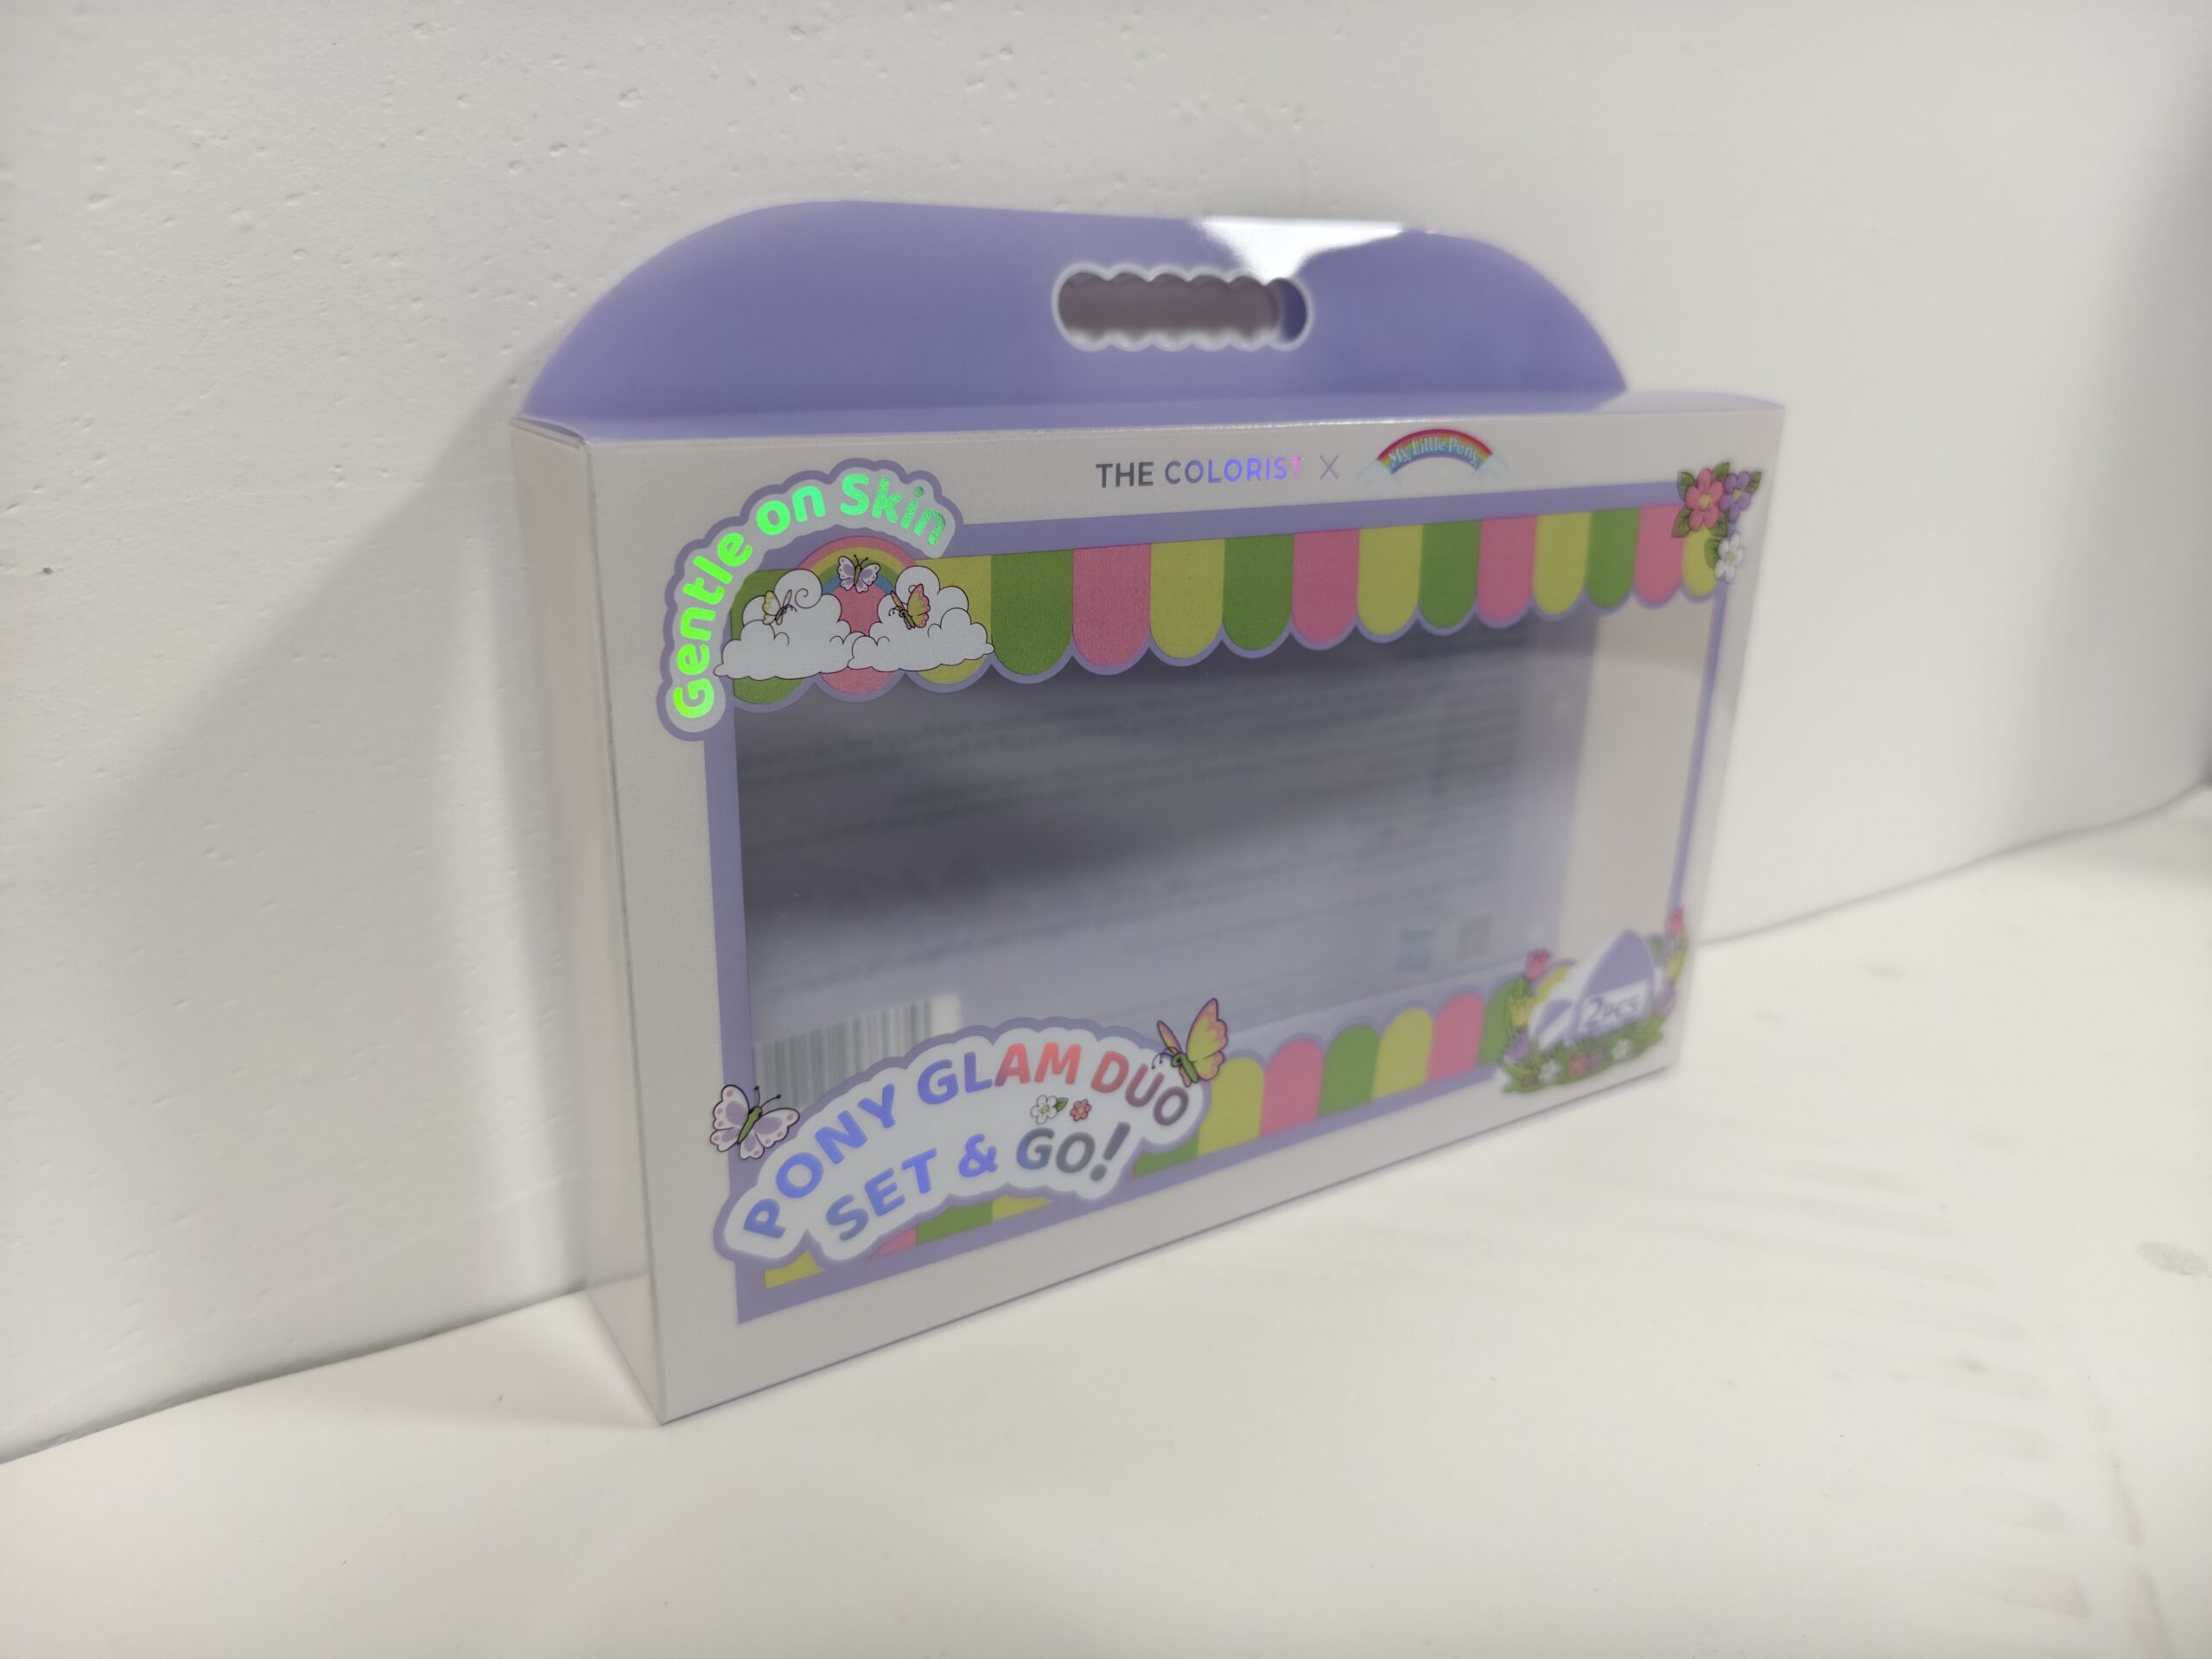
    Some PET packaging boxes require printing or additional finishing to improve brand recognition.

    Common customization options include:

    • Logo printing
    • Product information printing
    • Color patterns
    • Special surface effects

    Transparent PET boxes are often used without printing because the clear appearance itself provides a premium product display effect.

    For printed PET packaging boxes, manufacturers usually need to confirm artwork files, colors, printing methods, and production quantities before starting mass production.

    Because printing involves additional processes, it may affect production time and overall cost. Buyers should confirm these details early during the design stage.

    custom PET packaging box pricing guide

    Quality Inspection for PET Packaging Boxes

    After the production process is completed, manufacturers need to inspect the finished PET packaging boxes before shipment.

    Quality inspection helps ensure that the boxes meet customer requirements in terms of appearance, structure, and usability.

    Common inspection items include:

    • Box dimensions
    • Folding accuracy
    • Surface scratches or marks
    • Transparency and appearance
    • Printing quality (for printed boxes)
    • Assembly performance

    For transparent PET packaging boxes, appearance inspection is especially important because customers usually choose PET boxes for product visibility and presentation.

    A small defect such as scratches, unclear folding lines, or incorrect dimensions may affect the final packaging experience.

    Professional manufacturers normally check samples during production and perform final inspections before packing to reduce quality problems.

    Packing and Shipping of PET Packaging Boxes

    After quality inspection, PET packaging boxes are prepared for packing and shipment.

    Because PET folding boxes can be shipped flat, they can save storage space and reduce transportation volume compared with pre-assembled packaging.

    During packing, manufacturers usually pay attention to:

    • Protection against scratches
    • Quantity accuracy
    • Carton strength
    • Shipping safety

    For international orders, proper packing is important because products may experience long-distance transportation and multiple handling processes.

    A reliable PET packaging box supplier should consider not only production quality but also how the products arrive safely at the customer’s location.

    Why Choose an Experienced PET Packaging Box Manufacturer?

    Choosing the right manufacturer can affect the final quality, cost, and delivery experience of custom PET packaging boxes.

    An experienced supplier can help customers with:

    • Material selection
    • Box structure optimization
    • Production suggestions
    • Quality control
    • Packaging solutions

    For buyers who are developing new products, working with a manufacturer that understands PET folding box production can reduce communication problems and avoid unnecessary production mistakes.

    A good supplier should not only produce boxes according to drawings but also provide practical recommendations based on product requirements.

    How to Choose the Right PET Packaging Box Manufacturer

    Conclusion: Understanding the PET Packaging Box Manufacturing Process

    Understanding how custom PET packaging boxes are made helps buyers make better decisions when selecting packaging suppliers.

    From material selection and structural design to cutting, creasing, folding, printing, and quality inspection, every production step can influence the final packaging quality.

    A reliable PET packaging box manufacturer should provide not only production capability but also professional suggestions during the development process.

    By working with an experienced supplier, customers can achieve better packaging performance, stable quality, and more efficient production.

    If you are looking for custom PET packaging boxes for cosmetics, phone accessories, toys, gifts, or other products, our team can help you develop a suitable packaging solution.

    Contact us to discuss your PET packaging box requirements and request a quotation.

  • How to Reduce Custom PET Packaging Box Costs Without Sacrificing Quality

    How to Reduce Custom PET Packaging Box Costs Without Sacrificing Quality

    Custom PET packaging box costs are affected by material thickness, box size, structure, printing, finishing, order quantity, inserts, packing method, and production complexity.

    To reduce PET packaging box costs effectively, buyers should review material thickness, box structure, printing, order quantity, and shipping together.

    Reducing cost does not always mean choosing the thinnest material or the lowest quotation. An unsuitable cost-cutting decision may cause weak box structure, poor folding performance, printing defects, product movement, or additional rework.

    A better approach is to remove unnecessary cost while keeping the functions that matter most for product protection, retail display, packing efficiency, and brand presentation.

    In this guide, we explain practical ways to reduce PET packaging box costs without sacrificing the quality required for mass production.

    Understand What Determines PET Packaging Box Cost

    Before reducing cost, buyers should understand which parts of a custom PET packaging project create the largest expenses.

    The final price is not based only on the external box dimensions. Two PET boxes with similar sizes may have different costs because of differences in sheet thickness, structural design, printing coverage, finishing processes, inserts, order quantity, and packing requirements.

    Some costs are fixed, such as dieline preparation, printing setup, tooling, and sample development. Other costs change with each piece, including PET material consumption, printing ink, gluing, folding, packing, and transportation volume.

    The most effective cost reduction usually comes from improving several areas together rather than making one extreme change.

    Main Cost Factors

    • Box dimensions
    • PET sheet thickness
    • Box structure
    • Printing colors and coverage
    • Surface finishing
    • Inserts and trays
    • Order quantity
    • Number of SKUs
    • Sampling and revisions
    • Assembly and packing method
    • Shipping volume

    Choose the Right PET Thickness Instead of the Thickest Material

    Using thicker PET does not automatically create better packaging. Excessive thickness increases material consumption, box weight, folding resistance, and production cost.

    The suitable thickness should be selected according to the product dimensions, product weight, box structure, panel size, display method, and required bottom strength.

    For lightweight products, a properly designed thinner PET box may provide enough support. For larger products, hanging packaging, or boxes with wide transparent panels, greater thickness may be necessary.

    The goal is to use enough material to maintain structure and presentation without adding thickness that does not provide a practical benefit.

    How to Avoid Paying for Unnecessary Thickness

    • Confirm the actual product weight
    • Check the size of the largest transparent panel
    • Match thickness to the box structure
    • Consider whether the box will stand or hang
    • Test bottom strength with the real product
    • Review folding performance before mass production
    • Approve the final thickness with a physical sample

    For more detailed guidance, read our PET packaging box thickness guide.

    Simplify the Box Structure Without Reducing Function

    Complex box structures usually require more PET material, longer dielines, additional locking tabs, more creasing positions, and extra assembly work.

    A simpler structure can reduce material consumption and production time while still providing suitable product protection and retail presentation.

    For many lightweight products, a standard tuck-end folding box may be more economical than an auto-lock bottom, two-piece box, or structure with multiple internal components.

    However, the structure should not be simplified to the point that the box becomes difficult to assemble, opens during handling, or cannot support the product weight.

    Ways to Simplify the Structure

    • Remove unnecessary panels or decorative flaps
    • Avoid complex locking systems when they are not required
    • Use a standard tuck-end structure for lightweight products
    • Reduce the number of separate packaging components
    • Keep hanger tabs only when retail hanging display is needed
    • Design the box for easy manual assembly
    • Use one-piece structures when practical
    • Test the simplified structure with the actual product

    Compare common structures in our PET packaging box styles guide.

    Reduce Printing Colors and Ink Coverage

    Printing cost is affected by the number of colors, ink coverage, printing method, white ink, and setup requirements.

    A design with fewer spot colors or smaller printed areas may be more economical than full-surface printing. Leaving part of the PET box transparent can also preserve product visibility while reducing ink usage.

    White ink should be used only where it is needed to support color opacity or improve readability. Large areas of white ink, metallic effects, or multiple finishing layers may increase both setup cost and production difficulty.

    The objective is not to remove branding, but to concentrate printing on the panels and design elements that create the most value.

    Practical Ways to Reduce Printing Cost

    • Reduce unnecessary printing colors
    • Keep selected panels transparent
    • Limit full-surface ink coverage
    • Use white ink only where required
    • Avoid printing on hidden panels
    • Simplify gradients and complex color transitions
    • Combine small design elements into fewer printing areas
    • Confirm whether spot-color printing can replace full-color printing
    • Approve the final artwork before printing setup

    Compare available processes in our PET packaging printing methods guide.

    Remove Unnecessary Finishing Processes

    Finishing processes can improve appearance, but each additional process increases setup time, production complexity, and cost.

    Hot stamping, spot UV, metallic ink, embossing, frosting, and other decorative effects should be used only when they provide a clear branding or retail benefit.

    For many transparent PET boxes, a clean structure with limited printing can already create a premium appearance. Adding too many finishes may increase cost without significantly improving the customer’s perception of the product.

    Buyers should identify which finishing details are essential and remove those that are only decorative but do not support the main packaging objective.

    Questions to Ask Before Adding a Finish

    • Does the finish improve product visibility?
    • Is it important for brand recognition?
    • Will customers notice the difference?
    • Is the finish required on every panel?
    • Can printing create a similar effect at lower cost?
    • Will the finish affect folding or ink adhesion?
    • Does it increase sample or production lead time?
    • Can the process be removed without reducing packaging function?

    Increase Order Quantity Carefully

    Higher order quantities can reduce the unit cost because fixed expenses are distributed across more pieces.

    Printing setup, tooling, dieline preparation, sampling, and machine adjustment do not increase at the same rate as the production quantity. As a result, the cost per box is usually lower when the order quantity increases.

    However, ordering more boxes only to obtain a lower unit price may create excess inventory, storage pressure, outdated artwork, or unused packaging if the product design changes.

    The better approach is to compare several realistic quantity options and choose the level that balances unit cost with expected sales and inventory risk.

    How to Choose a Cost-Effective Order Quantity

    • Confirm the expected sales volume
    • Compare quotations at several quantity levels
    • Check the quantity required for each SKU
    • Consider warehouse and storage capacity
    • Review the risk of product or artwork changes
    • Estimate repeat order frequency
    • Avoid ordering excessive inventory only for a lower unit price
    • Choose a quantity that supports both cost control and cash flow

    For more information about minimum quantities, read our custom PET packaging box MOQ guide.

    Use the Same Box Structure Across Multiple SKUs

    Using the same box dimensions and structure across several SKUs can reduce tooling, dieline preparation, sampling, and production setup costs.

    This approach works best when the products have similar dimensions and weights. Different models can share the same PET box while using different printed artwork, labels, inserts, or internal positioning.

    Standardizing the structure also simplifies purchasing, inventory management, packing instructions, and repeat orders.

    However, products should not be forced into one standard box if the fit becomes too loose, the insert becomes complicated, or the retail presentation is weakened.

    When SKU Standardization Works Well

    • Products have similar external dimensions
    • Product weights are close
    • The same opening and closure method is suitable
    • Different versions can be identified through printing or labels
    • A simple insert can adjust small size differences
    • The box still provides suitable product protection
    • The shared structure remains easy to assemble
    • The final appearance is acceptable for every SKU

    Confirm Dimensions and Artwork Before Sampling

    Repeated changes to dimensions, dielines, artwork, or printing requirements can increase sampling cost and delay production.

    Before a sample is prepared, buyers should confirm the product size, product weight, packing orientation, accessories, insert requirements, box structure, PET thickness, printing area, and artwork version as clearly as possible.

    Incomplete information may lead to a sample that fits poorly, uses the wrong structure, or requires a new dieline. If printing has already been prepared, artwork changes may also create additional setup or plate costs.

    Providing accurate information at the beginning helps the manufacturer prepare a more reliable sample and reduces unnecessary revisions.

    Information to Confirm Before Sampling

    • Maximum product length, width, and height
    • Product weight
    • Product photos from several angles
    • Packing orientation
    • Accessories and insert requirements
    • Preferred box structure
    • PET thickness
    • Printing colors and coverage
    • Transparent areas
    • Final artwork version
    • Expected order quantity
    • Required sample type

    Review our PET packaging box quotation requirements before submitting your project details.

    Ship PET Boxes Flat When Possible

    Shipping PET boxes flat can reduce carton volume, improve packing efficiency, and lower transportation costs.

    Pre-assembled boxes occupy much more space and may also be more easily deformed during shipment. Flat-packed boxes can usually be stacked more efficiently and protected more consistently inside export cartons.

    However, flat shipping is suitable only when the box structure can be assembled easily at the buyer’s warehouse, packing line, or fulfillment center.

    If assembly requires too much labor, special equipment, or complex locking steps, the savings in freight may be offset by higher packing costs.

    When Flat Shipping Is a Good Option

    • The box can be folded and assembled easily
    • The buyer has available packing labor
    • No special assembly equipment is required
    • The structure remains stable after assembly
    • The boxes can be stacked safely while flat
    • Printed surfaces can be protected during shipment
    • Assembly instructions are clear
    • Freight volume savings are greater than the added labor cost

    Learn more in our guide to how custom PET packaging boxes are packed and shipped.

    Reduce Inserts and Separate Components

    Inserts, trays, dividers, and separate accessories can improve product positioning, but they also add material, tooling, assembly, and packing costs.

    Before including an insert, confirm whether the outer PET box can hold the product securely by itself. For lightweight or regularly shaped products, a well-designed box structure may provide enough support without an additional tray.

    When an insert is necessary, keep the design simple and use only the material required to prevent movement or improve presentation.

    The goal is to avoid separate components that increase cost without providing clear protection, organization, or display value.

    How to Reduce Insert Cost

    • Remove inserts that do not improve product protection
    • Use a simple folded insert instead of a complex tray
    • Reduce the number of separate components
    • Combine several functions into one insert
    • Avoid oversized inserts with unnecessary material
    • Confirm whether the product can be held by the box structure
    • Standardize insert dimensions across similar SKUs
    • Test the final packed arrangement before production

    Avoid Repeated Sampling and Design Changes

    Repeated sampling and design changes can increase material usage, labor, tooling adjustments, printing setup, and project lead time.

    Some revisions are necessary, especially when product fit, box strength, folding quality, or printing accuracy has not yet been confirmed. However, avoidable changes often happen because dimensions, artwork, accessories, or packing requirements were not finalized before sampling.

    Buyers can reduce these costs by collecting internal feedback early, using the correct product sample, confirming the latest artwork version, and reviewing all requirements before requesting another sample.

    The objective is not to skip sample approval, but to make each sample round more useful and reduce unnecessary repetition.

    How to Reduce Unnecessary Sample Revisions

    • Use the actual product or an accurate reference sample
    • Confirm dimensions before preparing the dieline
    • Collect feedback from all decision-makers early
    • Use one clearly identified artwork version
    • Confirm printing colors, transparent areas, and finishes
    • Review the box structure before printed sampling
    • Record all requested changes in one revision list
    • Approve the plain structure before adding complex printing
    • Compare the sample with the final production requirements

    Use our PET packaging box sample checklist before approving mass production.

    Compare the Total Cost, Not Only the Unit Price

    The lowest unit price is not always the lowest total cost.

    A quotation should be reviewed together with tooling, sampling, printing setup, inserts, assembly, packing, shipping volume, expected defect risk, and potential rework.

    A slightly higher unit price may be more economical if the box fits correctly, assembles efficiently, ships flat, protects the product, and reduces production problems.

    Buyers should compare the complete packaging solution rather than evaluating only the price of each individual box.

    Costs to Compare Beyond the Unit Price

    • Dieline and tooling cost
    • Sample development cost
    • Printing setup cost
    • Insert and accessory cost
    • Assembly labor
    • Carton packing efficiency
    • Shipping volume
    • Defect and rework risk
    • Storage requirements
    • Repeat order convenience
    • Potential cost of product damage
    • Cost of future design changes

    The best way to reduce PET packaging box costs is to compare the total packaging solution instead of focusing only on the unit price.

    For a broader cost breakdown, read our custom PET packaging box pricing guide.

    How to Reduce PET Packaging Box Costs: Buyer Checklist

    • Confirm the actual product dimensions and weight
    • Select the required PET thickness instead of the maximum thickness
    • Use the simplest structure that still meets functional requirements
    • Reduce unnecessary printing colors and ink coverage
    • Remove finishes that do not provide clear value
    • Compare several realistic order quantities
    • Standardize box structures across similar SKUs when practical
    • Finalize dimensions, artwork, and inserts before sampling
    • Ship boxes flat when assembly conditions allow
    • Reduce unnecessary inserts and separate components
    • Record all revisions clearly before requesting another sample
    • Compare tooling, packing, shipping, and rework costs
    • Approve the final sample before mass production

    Need Help Reducing Your PET Packaging Box Cost?

    To reduce PET packaging box costs without sacrificing quality, each cost-saving decision should still protect product fit, strength, appearance, and packing efficiency.

    Reducing PET packaging box costs requires more than choosing the lowest quotation. The most effective solution should balance material usage, box structure, printing, order quantity, assembly, shipping, product protection, and retail presentation.

    Send us your product dimensions, weight, photos, expected order quantity, box structure, printing requirements, and delivery destination. If you already have artwork, a dieline, or a reference sample, include those files for review.

    Our team can evaluate the main cost factors and recommend practical adjustments that help control the total packaging cost without removing the functions required for production and retail use.

  • PET Packaging Box Quality Control: 8 Common Defects and Prevention Methods

    PET Packaging Box Quality Control: 8 Common Defects and Prevention Methods

    When ordering custom PET packaging boxes, buyers usually care about more than just the appearance and price. The box quality directly affects product presentation, customer experience, and brand image.

    However, during the production and transportation of PET packaging boxes, some quality problems may occur if the manufacturing process is not properly controlled.

    Common issues include surface scratches, broken folding lines, printing defects, incorrect dimensions, and deformation. These problems can affect the final packaging performance and may increase costs for buyers.

    A reliable PET packaging box manufacturer should have strict quality control procedures from material inspection to final shipment.

    In this guide, we will explain the most common PET packaging box quality problems, their causes, and how manufacturers can prevent these defects during production.

    Why PET Packaging Box Quality Control Is Important

    Custom PET packaging boxes are often used for products that require clear visibility and attractive presentation, such as cosmetics, phone accessories, toys, gifts, and retail products.

    Because PET boxes are transparent, even small surface defects can be easily noticed by customers. Scratches, dust, poor folding lines, or printing problems may reduce the overall appearance of the package.

    For brands and retailers, packaging quality is an important part of product value. A well-made PET box can improve shelf appeal, protect products, and create a more professional brand image.

    For manufacturers, quality control helps reduce production errors, avoid unnecessary waste, and ensure that every shipment meets the buyer’s requirements.

    Scratches on PET Surface

    Surface scratches are one of the most common PET packaging box quality problems, especially for transparent PET boxes.

    Because PET material has a clear and glossy surface, even small scratches can affect the appearance of the final packaging. For products displayed on retail shelves, visible scratches may reduce the professional look of the brand.

    Common Causes of PET Box Scratches

    PET box scratches may happen during different production and handling stages, including:

    • Dust or small particles between PET sheets during processing
    • Improper handling during cutting, creasing, or folding
    • Friction between boxes during packing and transportation
    • Lack of protective measures during production

    How Manufacturers Prevent Surface Scratches

    A professional PET packaging box manufacturer should take several steps to reduce scratching problems.

    First, the production area should be kept clean to prevent dust and particles from damaging the PET surface.

    Second, workers should handle PET sheets and finished boxes carefully during cutting, folding, inspection, and packing.

    For large orders, protective films, plastic bags, or suitable packing methods can also help protect the surface quality during transportation.

    Strict inspection before shipment is also important to ensure that boxes with visible scratches are removed before delivery.

    Cracks or Broken Folding Lines

    Cracks or broken folding lines are another common PET packaging box quality problem, especially for folding boxes that require precise creasing and assembly.

    The folding lines determine how easily the PET box can be formed and whether the final box keeps a clean appearance. If the creasing process is not properly controlled, cracks or stress marks may appear during folding.

    Common Causes of Folding Line Problems

    Several factors can cause cracks or damaged folding lines:

    • Incorrect creasing pressure during production
    • Unsuitable PET sheet thickness for the box design
    • Poor adjustment of production equipment
    • Excessive force during manual folding or assembly

    When folding lines are too deep, the PET material may become weak and crack easily. When the pressure is too low, the box may not fold correctly and the structure may become unstable.

    How Manufacturers Prevent Folding Line Defects

    To prevent folding line problems, manufacturers should control the creasing process carefully.

    Before mass production, the creasing position and pressure should be tested according to the PET material thickness and box structure.

    Experienced operators should check whether the folding lines are clean and accurate during production.

    A final inspection before packing can help identify boxes with broken lines, deformation, or poor folding performance before shipment.

    White Crease Marks on PET Boxes

    White crease marks are another common issue that may affect the appearance of transparent PET packaging boxes.

    When PET sheets are folded, excessive stress on the folding area can create visible white lines or marks. These marks are especially noticeable on clear PET boxes because the transparent material makes surface changes easier to see.

    Common Causes of White Crease Marks

    White crease marks are usually caused by:

    • Excessive creasing pressure during production
    • Incorrect adjustment of creasing equipment
    • PET material thickness not matching the box design
    • Improper folding methods during assembly

    If the folding process is not properly controlled, the PET material may become stressed around the crease area and create unwanted white marks.

    How Manufacturers Reduce White Crease Marks

    To minimize white crease marks, manufacturers should select suitable PET thickness and adjust creasing pressure according to the product structure.

    Before production, testing samples can help confirm whether the folding lines are suitable for the material.

    During manufacturing, operators should inspect the crease quality and adjust the equipment when necessary.

    A professional PET packaging box factory should balance folding performance and appearance quality to ensure the finished boxes meet customer expectations.

    Printing Defects on PET Packaging Boxes

    For printed PET packaging boxes, printing quality is an important factor that affects the final appearance and brand presentation.

    Common printing defects may include color differences, unclear patterns, poor ink adhesion, and missing printing areas. These problems can make the packaging look inconsistent and may affect the buyer’s brand image.

    Common Causes of Printing Defects

    Printing problems can happen due to several reasons:

    • Incorrect printing settings
    • Poor color matching during production
    • Contaminated PET surfaces before printing
    • Improper ink adhesion treatment
    • Insufficient quality inspection after printing

    Because PET packaging boxes are often used for retail products, even small printing differences can be noticeable, especially for brands that require consistent packaging appearance.

    How Manufacturers Prevent Printing Problems

    To reduce printing defects, manufacturers should confirm the artwork, colors, and printing requirements before production.

    Sample approval is also an important step before mass production. Buyers can check the actual printing effect and confirm colors before the full order begins.

    During production, manufacturers should inspect printed sheets carefully to ensure the pattern, color, and position meet the approved sample.

    For custom PET packaging boxes with printing requirements, strict quality control helps ensure every box maintains a consistent appearance.

    Incorrect PET Packaging Box Dimensions

    Incorrect dimensions are another important PET packaging box quality problem that may affect product fitting and assembly.

    For custom packaging boxes, even a small size difference can cause problems. The product may not fit properly inside the box, or the folding structure may not close correctly.

    Common Causes of Dimension Problems

    PET box dimension problems can happen because of:

    • Incorrect measurements provided during the design stage
    • Mistakes when creating the cutting template
    • Production equipment adjustment errors
    • Lack of sample confirmation before mass production

    For custom orders, the box size, folding structure, and product requirements should always be confirmed before production begins.

    How Manufacturers Prevent Size Errors

    A professional PET packaging box manufacturer should check all drawings and specifications before making production samples.

    Sample approval is an effective way to confirm dimensions, folding performance, and product fitting before starting bulk production.

    During mass production, regular inspections should be performed to ensure the cutting and folding processes remain consistent.

    Clear communication between buyers and manufacturers can also help avoid dimension problems and ensure the final PET boxes meet the customer’s requirements.

    Folding Alignment Problems

    Folding alignment problems can affect the appearance and usability of custom PET packaging boxes.

    PET folding boxes rely on accurate crease lines and cutting positions to achieve a proper structure. If the folding position is not accurate, the box may look uneven or fail to close correctly.

    Common Causes of Folding Alignment Problems

    Folding alignment issues may happen because of:

    • Incorrect cutting or creasing position
    • Machine adjustment problems during production
    • Inaccurate templates or drawings
    • Material movement during processing

    For transparent PET boxes, even small alignment differences can be easily noticed because the clear surface shows every structural detail.

    How Manufacturers Prevent Folding Alignment Problems

    To reduce folding alignment problems, manufacturers should check cutting and creasing accuracy before mass production.

    Production samples should be assembled and tested to confirm that all folding lines, locking parts, and connecting areas work properly.

    During production, operators should regularly inspect the box structure and adjust equipment settings when necessary.

    A complete quality inspection before shipment helps ensure that PET packaging boxes have consistent folding performance and appearance.

    Printing Color Differences

    For custom PET packaging boxes with printing, color consistency is an important part of quality control.

    Because PET boxes are often used for product display, even small color differences may affect the overall appearance of the packaging.

    Printing problems can happen because of differences in artwork files, color settings, printing conditions, or material surfaces.

    Common Causes of Printing Color Differences

    Printing color differences may occur due to:

    • Incorrect color settings in design files
    • Differences between digital samples and actual printed results
    • Uneven ink application during printing
    • Lack of sample approval before mass production

    For brands that require consistent packaging appearance, controlling printing quality is especially important for repeat orders.

    How Manufacturers Prevent Printing Color Problems

    To reduce printing color differences, manufacturers should confirm artwork files and printing requirements before production.

    A pre-production sample allows buyers to check the actual printing effect and confirm colors before mass production begins.

    During production, printed PET sheets should be inspected to ensure that colors, patterns, and positions match the approved sample.

    Clear communication between buyers and manufacturers helps avoid misunderstandings and ensures that custom PET packaging boxes meet the expected appearance standards.

    Packaging and Shipping Damage

    Even when PET packaging boxes are produced with good quality, improper packing or transportation can cause damage before they reach the buyer.

    Because PET boxes are transparent and lightweight, they need suitable protection during storage and shipping to avoid scratches, deformation, or crushing.

    Common Causes of Shipping Damage

    Shipping damage may happen because of:

    • Weak outer cartons
    • Insufficient protection between boxes
    • Excessive stacking pressure
    • Rough handling during transportation
    • Improper storage conditions

    For international shipments, long-distance transportation and multiple handling processes can increase the risk of packaging damage.

    How Manufacturers Prevent Shipping Damage

    To protect PET packaging boxes during delivery, manufacturers should use suitable packing methods according to the box size, thickness, and order quantity.

    Flat packing is commonly used for PET folding boxes because it reduces shipping volume and helps protect the box structure.

    Strong export cartons should be selected to prevent crushing during transportation. Additional protection materials can also be used when necessary.

    Before shipment, manufacturers should check carton condition, product quantity, and packing method to ensure the order is prepared correctly.

    Buyers should also inspect cartons and products after delivery and report any visible damage as soon as possible.

    PET Packaging Box Quality Control Process

    A reliable PET packaging box manufacturer should have a complete quality control process to ensure stable product quality from material preparation to final shipment.

    Quality control is not only about checking finished products. It should be included in every stage of production.

    Material Inspection

    Before production begins, manufacturers should check the PET material quality, thickness, transparency, and surface condition.

    Using suitable PET sheets helps ensure that the finished boxes have good appearance and structural performance.

    Production Process Inspection

    During cutting, creasing, folding, and gluing processes, manufacturers should regularly check production accuracy.

    Operators should inspect folding lines, box structure, and appearance quality to identify problems early.

    Sample Approval Before Mass Production

    For custom PET packaging boxes, sample approval is an important step before bulk production.

    Buyers can confirm box size, structure, printing effect, and overall appearance before the full order starts.

    This helps reduce misunderstandings and prevents unnecessary production changes.

    Final Product Inspection

    Before packing, finished PET boxes should be inspected for:

    • Surface scratches
    • Folding accuracy
    • Printing quality
    • Box dimensions
    • Quantity accuracy

    Only qualified products should be prepared for shipment.

    Packing Inspection Before Shipping

    Before delivery, manufacturers should confirm carton strength, packing quantity, and shipping labels.

    Proper packing inspection helps reduce damage risks during transportation and ensures buyers receive products in good condition.

    Conclusion

    Custom PET packaging box quality problems can affect product appearance, protection performance, and customer satisfaction.

    Common issues such as scratches, cracks, folding defects, printing differences, incorrect dimensions, and shipping damage can usually be reduced through proper production control and inspection.

    A reliable PET packaging box manufacturer should pay attention to every stage, including material selection, production process, sample approval, final inspection, and packing before shipment.

    For buyers, choosing an experienced manufacturer and confirming product details before mass production can help avoid unnecessary quality problems.

    If you are looking for custom PET packaging boxes with stable quality and professional production support, contact us with your box size, design requirements, and order quantity. We can help evaluate your packaging project and provide a suitable solution.

  • How Are Custom PET Packaging Boxes Packed and Shipped?

    How Are Custom PET Packaging Boxes Packed and Shipped?

    PET packaging box shipping requires suitable flat packing, surface protection, strong export cartons, and a clear transportation plan.

    Most PET folding boxes are shipped flat rather than fully assembled. Flat packing helps reduce carton volume, lower shipping costs, and protect the box structure during delivery.

    The exact packing and shipping method depends on the box size, PET thickness, printing requirements, order quantity, destination, and transportation method.

    In this guide, we will explain how custom PET packaging boxes are packed, protected, and shipped from the factory to the buyer.

    How Are PET Packaging Boxes Usually Packed?

    Custom PET packaging boxes are usually packed flat after production and inspection.

    A clear PET packaging box shipping plan can help reduce freight volume, prevent surface damage, and avoid misunderstandings about delivery responsibilities.

    Before packing, the boxes should be checked for scratches, cracks, white crease marks, printing defects, incorrect dimensions, and other visible quality problems.

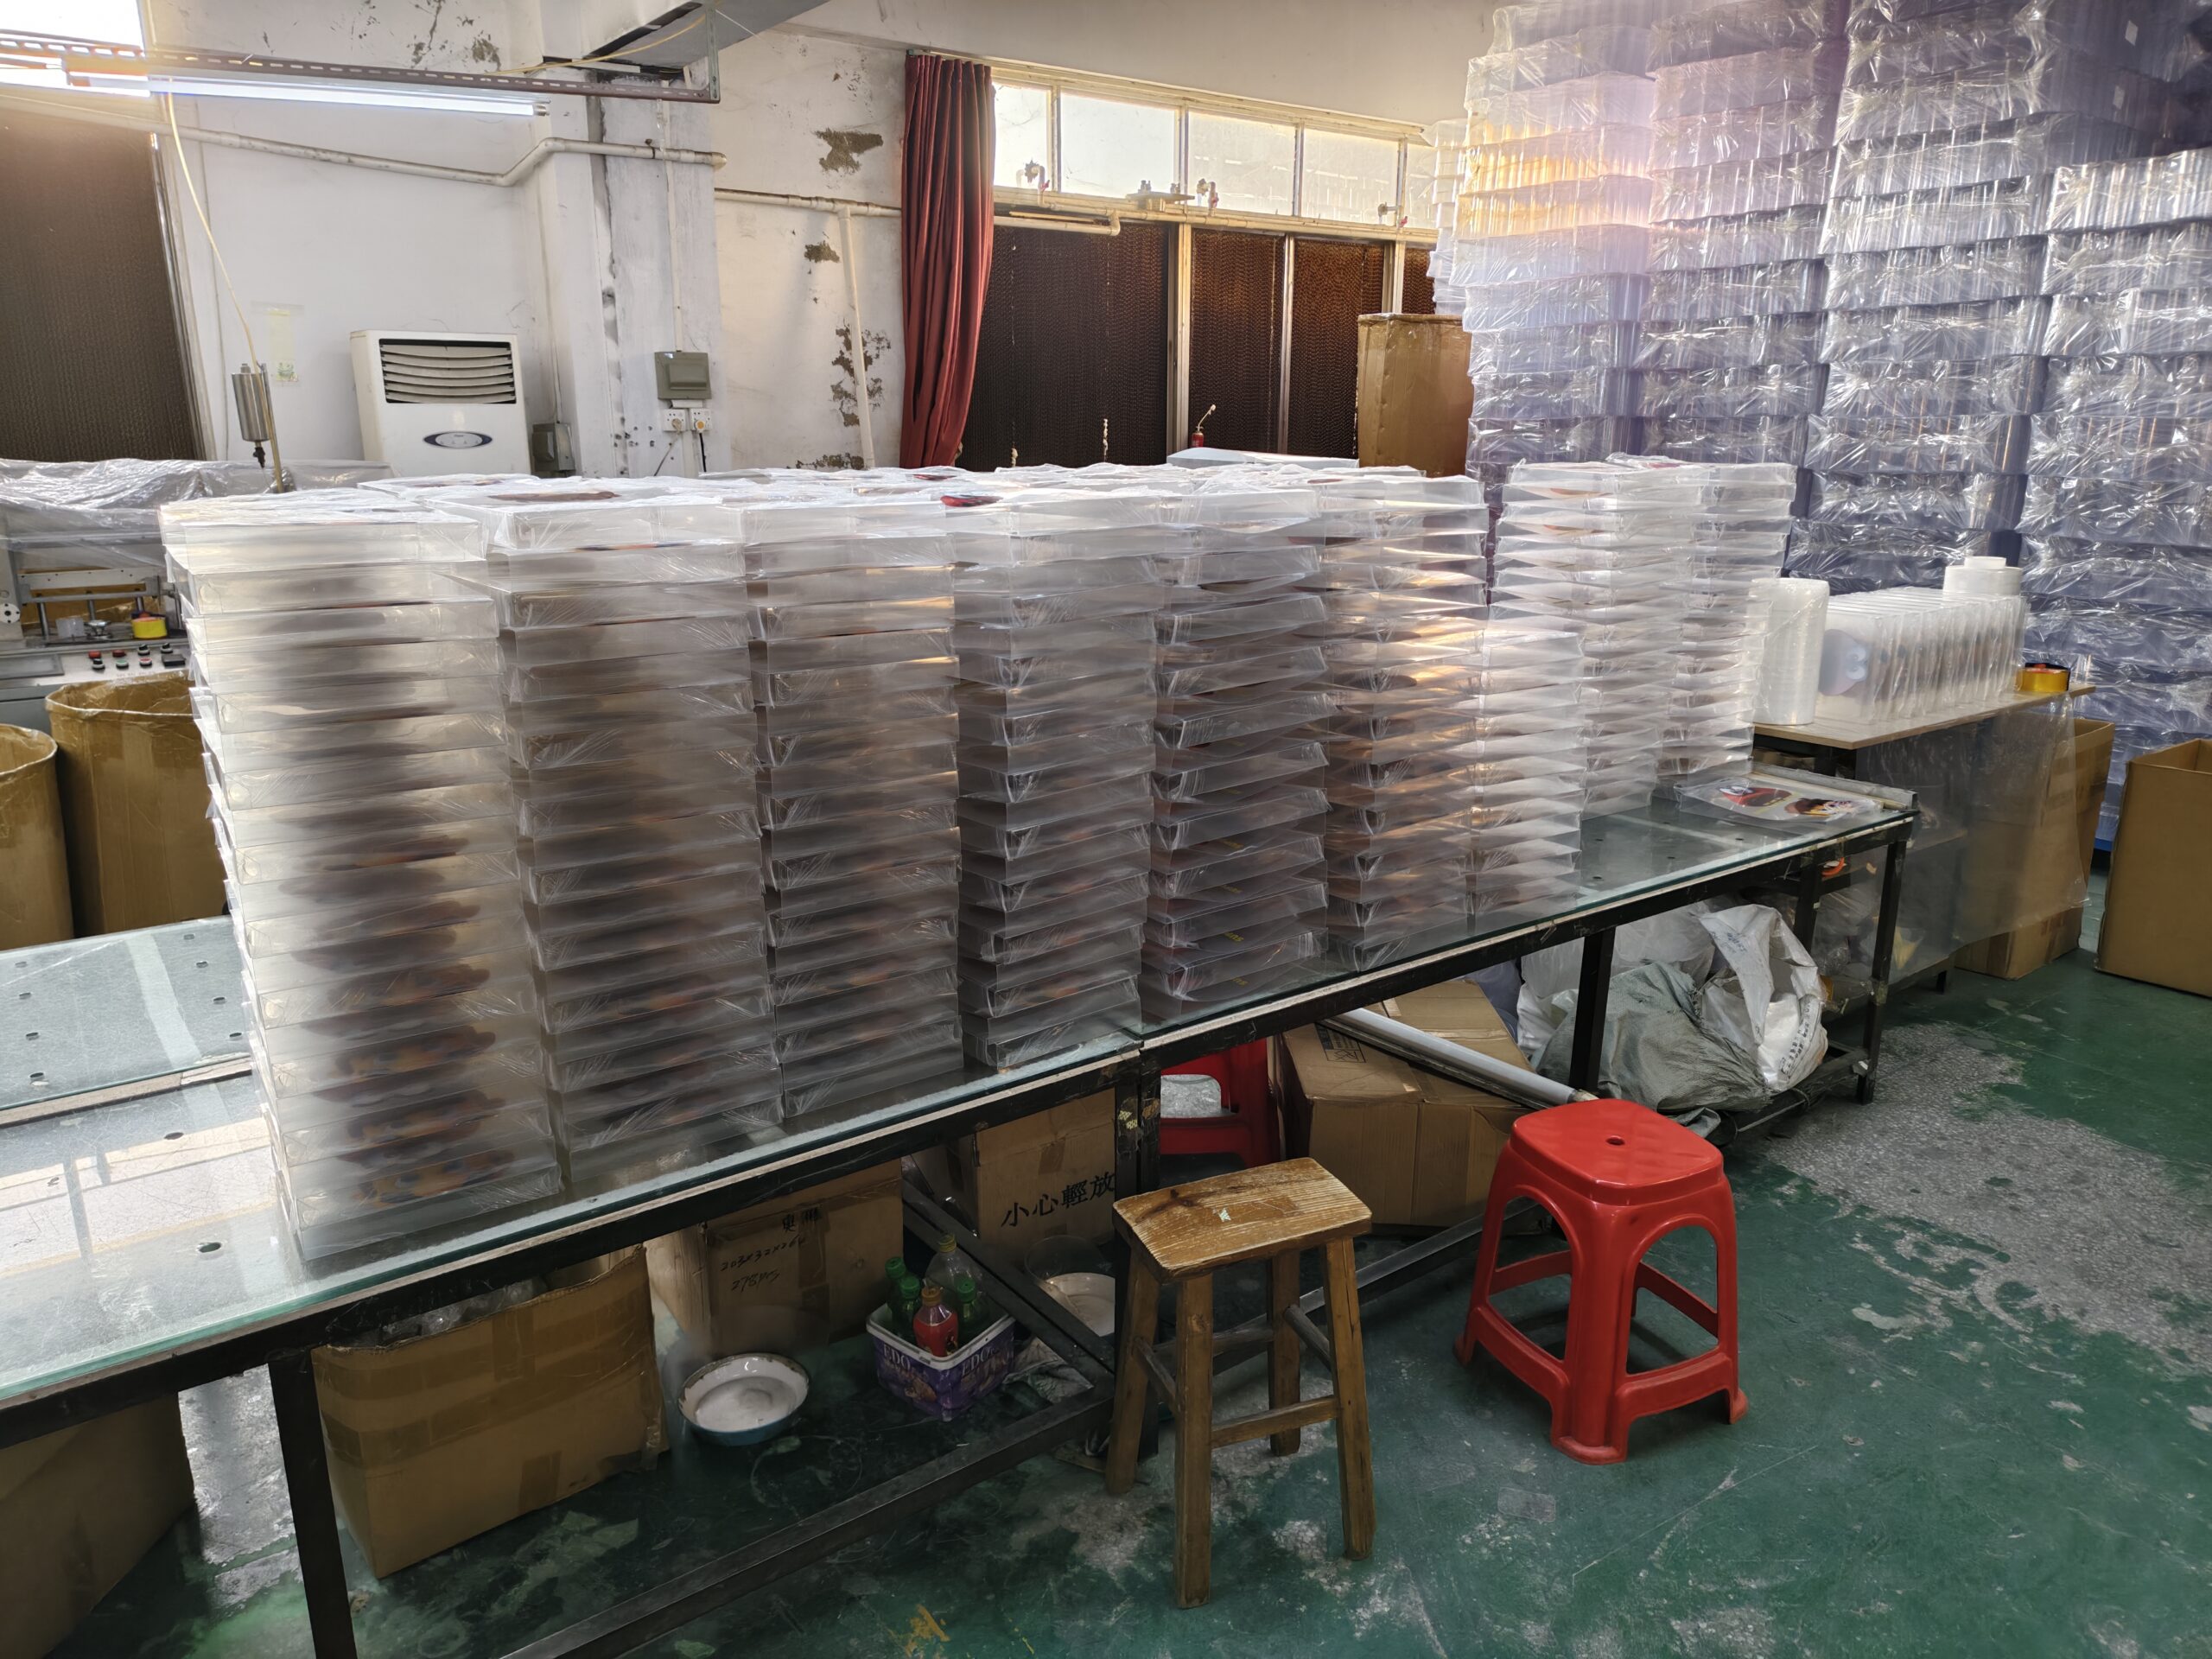
    The flat boxes are then arranged in neat stacks and packed according to the agreed quantity per bag or carton.

    Depending on the order requirements, the boxes may be packed in protective plastic bags, inner cartons, and export cartons to reduce dust, moisture, pressure, and movement during transportation.

    Why Are PET Packaging Boxes Usually Shipped Flat?

    Most custom PET packaging boxes are shipped flat instead of fully assembled.

    Flat packing reduces the amount of space required inside the shipping carton, which can lower freight costs and improve carton utilization.

    It also helps prevent the boxes from being crushed, deformed, or opened during transportation.

    After receiving the shipment, the buyer can fold and assemble the boxes before packing the final products.

    Reduce Shipping Volume

    A fully assembled PET box occupies much more space than a flat box.

    By stacking the boxes flat, more pieces can be packed into each carton, which helps reduce the total number of cartons required.

    This is especially important for overseas orders because air freight, express delivery, and sea freight costs are often affected by shipment volume.

    Protect the Box Structure

    Shipping PET boxes flat can also help protect the box shape during handling and transportation.

    Assembled boxes may be compressed, bent, or opened when cartons are moved or stacked.

    Flat boxes can be arranged more evenly inside the carton, reducing pressure on the side panels, flaps, and locking structures.

    Make Storage More Efficient

    Flat-packed PET boxes require less storage space after they arrive at the buyer’s warehouse.

    The boxes can be stored in cartons and assembled only when they are needed for packing.

    This can help buyers manage inventory more efficiently, especially when the order quantity is large.

    How Are PET Packaging Boxes Protected During Packing?

    Because PET packaging boxes have clear and glossy surfaces, they require careful protection during packing.

    The packing method should reduce friction, dust, moisture, pressure, and movement inside the carton.

    The exact protection method depends on whether the boxes are clear or printed, the PET thickness, the box size, and the shipping distance.

    Use Protective Bags

    Flat PET boxes may be packed in plastic bags before they are placed into cartons.

    The bags help protect the surfaces from dust, moisture, and direct contact with the carton.

    For printed or high-gloss boxes, protective bags can also reduce friction between the boxes during handling.

    Keep the Boxes Aligned

    The flat boxes should be arranged in even stacks so that the edges, crease lines, and locking flaps remain aligned.

    Uneven stacking may create pressure on certain areas and increase the risk of bending, scratching, or deformation.

    The quantity per stack should be controlled according to the box size and PET thickness.

    Use Strong Export Cartons

    The outer cartons should be strong enough to protect the boxes during loading, transportation, and warehouse handling.

    Carton strength should be selected according to the shipment weight, carton size, stacking height, and shipping method.

    If necessary, additional corner protection, inner cartons, or cushioning materials can be used to reduce movement and pressure.

    For more details about surface protection and common defects, read our guide to PET packaging box quality problems and prevention.

    What Shipping Methods Are Available for PET Packaging Boxes?

    The most suitable PET packaging box shipping method depends on the order quantity, destination, budget, carton volume, and required delivery time.

    The shipping method should be selected according to the order quantity, destination, budget, carton volume, and required delivery time.

    Because PET folding boxes are lightweight but may occupy considerable carton volume, both actual weight and volumetric weight should be considered when comparing shipping costs.

    The most common options include express delivery, air freight, and sea freight.

    Express Delivery

    Express delivery is usually suitable for samples, small orders, replacement boxes, or urgent shipments.

    It is generally faster and easier to arrange than larger freight shipments, but the cost per carton may be higher.

    Before using express delivery, buyers should confirm the carton dimensions, chargeable weight, delivery address, and estimated transit time.

    Air Freight

    Air freight can be suitable for medium-sized orders that require faster delivery than sea freight.

    The cost is often affected by both actual weight and shipment volume, so flat packing is especially important.

    Buyers should also confirm whether airport pickup, customs clearance, and final delivery are included in the shipping arrangement.

    Sea Freight

    Sea freight is commonly used for larger orders when shipping cost is more important than delivery speed.

    It usually offers a lower transportation cost for high-volume shipments, but the transit time is longer and additional customs or local delivery arrangements may be required.

    The cartons should be strong enough for longer transportation, repeated handling, and warehouse stacking.

    Buyer-Arranged Shipping

    Some buyers prefer to use their own freight forwarder or shipping account.

    In this case, the factory should provide the carton quantity, carton dimensions, gross weight, pickup address, and expected ready date.

    Both sides should confirm clearly who is responsible for booking, export documents, pickup, customs clearance, and final delivery.

    What Information Should Be Confirmed Before Shipping?

    Before the shipment is booked, the buyer and manufacturer should confirm the main shipping details clearly.

    Incomplete delivery information may delay pickup, increase shipping costs, or create problems during customs clearance and final delivery.

    The required information depends on the shipping method and destination.

    Delivery Address and Contact Details

    The buyer should provide the complete delivery address, postal code, contact person, telephone number, and email address.

    For commercial addresses, the company name and any receiving restrictions should also be confirmed.

    Incorrect or incomplete information may cause delivery delays, additional charges, or returned shipments.

    Carton Quantity and Dimensions

    The factory should provide the final carton quantity, carton dimensions, gross weight, and net weight after packing is completed.

    These details help the buyer or freight forwarder calculate shipping costs and arrange the correct transportation method.

    Because PET packaging boxes may have a relatively low actual weight but large carton volume, volumetric weight should also be considered.

    Shipping Terms and Responsibilities

    Both sides should confirm who is responsible for freight booking, export documents, customs clearance, duties, local delivery, and any additional shipping charges.

    The agreed shipping terms should be written clearly in the quotation or order confirmation.

    This helps prevent misunderstandings about which costs and responsibilities are included.

    Production and Transit Time

    Production lead time and shipping transit time should be calculated separately.

    The factory may provide an estimated production completion date, while the courier or freight forwarder provides the estimated transportation time.

    Buyers should also allow extra time for customs clearance, weekends, holidays, weather, port congestion, or other possible delays.

    For production planning, read our PET packaging box lead time guide before confirming the required delivery date.

    How Can Buyers Reduce Shipping Risks?

    Shipping risks can be reduced when the packing method, carton specifications, transportation plan, and delivery responsibilities are confirmed before shipment.

    Buyers should review the shipping details carefully instead of considering freight only after production is completed.

    Confirm the Packing Method Before Production

    The packing method should be discussed before mass production, especially for large, printed, or high-gloss PET boxes.

    Both sides should confirm whether the boxes will be shipped flat, how many pieces will be packed per bag or carton, and whether inner cartons or additional protection are required.

    Confirming these details early allows the factory to prepare suitable cartons and avoid last-minute packing changes.

    Avoid Overloading the Cartons

    Putting too many PET boxes into one carton may increase pressure on the lower stacks and raise the risk of bending, crease damage, or surface marks.

    The quantity per carton should be selected according to the box dimensions, PET thickness, carton strength, and total shipment weight.

    A slightly larger number of well-protected cartons may be safer than fewer cartons that are overloaded.

    Request Packing Photos Before Shipment

    Before pickup, buyers can ask for photos showing the packed boxes, protective bags, carton condition, shipping marks, and total carton quantity.

    Packing photos help confirm that the shipment has been prepared according to the agreed method.

    They can also provide a useful reference if any carton damage or quantity problem is found after delivery.

    Inspect the Cartons After Delivery

    After the shipment arrives, the buyer should check the outer cartons for crushing, moisture, holes, or other visible damage before opening them.

    If serious damage is found, photos should be taken immediately and the courier or freight forwarder should be informed.

    The PET boxes should then be checked for scratches, bending, deformation, or quantity differences before they are used for packing.

    Frequently Asked Questions About PET Packaging Box Shipping

    Are PET Packaging Boxes Usually Shipped Flat?

    Yes. Most PET folding boxes are shipped flat because flat packing reduces carton volume, lowers shipping costs, and helps protect the box structure during transportation.

    The buyer normally assembles the boxes after receiving the shipment.

    How Are Clear PET Boxes Protected From Scratches?

    Clear PET boxes are usually arranged in aligned stacks and may be packed in protective bags, inner cartons, or export cartons.

    The packing method should reduce friction, dust, moisture, pressure, and movement inside the carton.

    Which Shipping Method Is Best for PET Packaging Boxes?

    The best shipping method depends on the order quantity, destination, budget, carton volume, and required delivery time.

    Express delivery is often used for samples or urgent small shipments, while air freight and sea freight are more suitable for larger commercial orders.

    Conclusion

    Custom PET packaging boxes are normally inspected, stacked flat, protected with suitable packing materials, and placed into strong cartons before shipment.

    Flat packing helps reduce freight volume, protect the box structure, and improve storage efficiency after delivery.

    The final PET packaging box shipping plan should be confirmed according to the box size, PET thickness, printing requirements, order quantity, destination, and required delivery schedule.

    Before shipment, buyers should confirm the packing method, carton quantity, carton dimensions, shipping responsibilities, production completion date, and estimated transit time.

    If you are planning a custom PET packaging box order, contact us with your box size, quantity, destination, and shipping requirements. We can help evaluate the packing method and provide the shipment details required for freight planning.

  • Custom PET Packaging Box Order Process: From Inquiry to Delivery

    Custom PET Packaging Box Order Process: From Inquiry to Delivery

    Ordering custom PET packaging boxes involves more than simply choosing a box size and placing an order.

    The PET packaging box order process usually includes inquiry, quotation, box structure confirmation, artwork preparation, sampling, mass production, quality inspection, packing, and delivery.

    Each step helps ensure that the final packaging matches the product dimensions, printing requirements, material specifications, and expected use.

    Understanding the complete order process can help buyers prepare the required information in advance, reduce unnecessary revisions, and avoid delays.

    In this guide, we will explain each stage of ordering custom PET packaging boxes from the first inquiry to final delivery.

    What Is the PET Packaging Box Order Process?

    The PET packaging box order process is the sequence of steps used to turn a buyer’s packaging requirements into finished custom boxes.

    The process normally begins when the buyer provides basic project information, such as box dimensions, order quantity, material requirements, printing details, and product use.

    The manufacturer then reviews the requirements, prepares a quotation, confirms the box structure, and arranges sampling if necessary.

    After the sample and all production details are approved, the order moves into mass production, inspection, packing, and shipping.

    A clear order process helps both the buyer and the manufacturer confirm responsibilities, reduce misunderstandings, and keep the project on schedule.

    Step-by-Step PET Packaging Box Order Process

    Although every custom packaging project is different, most PET packaging box orders follow a similar sequence.

    The following steps show how the process normally moves from the initial inquiry to final delivery.

    Submit the Initial Inquiry

    The order process begins when the buyer sends the basic packaging requirements to the manufacturer.

    The more complete the inquiry information is, the easier it is for the factory to evaluate the project and prepare an accurate quotation.

    Important information may include:

    • Product dimensions
    • Required box dimensions
    • Order quantity
    • PET material and thickness
    • Box structure
    • Printing requirements
    • Product weight
    • Packing method
    • Expected delivery schedule

    If some details are not yet confirmed, the buyer can also provide product photos, samples, or reference packaging for evaluation.

    Before sending an inquiry, you can review our custom PET packaging box quotation requirements guide to see what information should be prepared.

    Review the Quotation

    After receiving the inquiry, the manufacturer reviews the project requirements and prepares a quotation.

    The quotation may include the unit price, tooling or plate costs if applicable, sample cost, minimum order quantity, estimated production time, packing method, and shipping terms.

    The final price can vary depending on the box size, PET thickness, order quantity, printing method, structure complexity, and whether inserts or special finishes are required.

    Before confirming the order, buyers should check that the quotation clearly matches the requested specifications and ask questions about any unclear items.

    Confirm Box Size and Structure

    Once the quotation is accepted, the next step is to confirm the box dimensions and structure.

    The box design should match the actual product size, weight, display method, and packing requirements.

    If the buyer does not have a finished dieline, the manufacturer may prepare a structural drawing based on the product dimensions or a physical sample.

    Before moving forward, both sides should confirm the box length, width, height, closure style, hanging tab, insert, and any other structural details.

    If the box dimensions are not yet confirmed, read our PET packaging box measurement guide before finalizing the structure.

    Prepare and Confirm the Artwork

    After the box dimensions and structure are confirmed, the printing artwork can be prepared.

    The artwork should match the approved dieline and clearly show the logo, text, colors, printing position, barcode, and any other required design elements.

    Before production, both sides should check the artwork carefully to avoid errors in spelling, color, size, or placement.

    If revisions are required, the final production file should be updated and confirmed before sampling or printing begins.

    For more details, read our guide on preparing artwork and dielines for custom PET packaging boxes.

    Make and Approve the Sample

    A sample may be prepared before mass production to confirm the box size, structure, material, transparency, printing, and overall appearance.

    The buyer can check whether the actual product fits correctly, whether the box is easy to assemble, and whether the final presentation meets the project requirements.

    If changes are needed, they should be completed before mass production begins.

    Once the sample and all related details are approved, the order can move to the production stage.

    Before approving the sample, review our PET packaging box sample inspection guide to check the key details that should be confirmed.

    Confirm the Order and Payment Terms

    After the sample and production details are approved, the buyer and manufacturer confirm the final order.

    The order confirmation should include the box specifications, quantity, unit price, total amount, payment terms, production schedule, packing method, and shipping arrangement.

    Any special requirements should be written clearly before production begins.

    Once the required payment is received and all details are confirmed, the factory can arrange material preparation and production.

    Arrange Mass Production

    During mass production, the factory prepares the PET material and follows the approved box structure, dimensions, artwork, and sample.

    Depending on the project, the production process may include printing, cutting, creasing, folding, gluing, inspection, and packing.

    The production time depends on the order quantity, printing method, box structure, material availability, and current factory schedule.

    For the most accurate delivery plan, buyers should confirm the estimated production lead time before placing the final order.

    You can also read our PET packaging box lead time guide to understand the main factors that affect the production schedule.

    Inspect the Finished Boxes

    After production is completed, the finished PET packaging boxes should be inspected before packing and shipment.

    The inspection may include box dimensions, PET thickness, transparency, printing position, color consistency, crease lines, folding performance, gluing, locking structure, and overall appearance.

    The quantity should also be checked to confirm that it matches the order requirements.

    Any obvious scratches, cracks, white crease marks, printing defects, or structural problems should be identified before the boxes are packed.

    For more information about common defects, read our guide to PET packaging box quality problems and prevention.

    Pack the Finished Boxes

    After inspection, the finished boxes are packed according to the agreed packing method.

    PET folding boxes are often shipped flat to reduce packing volume, protect the box shape, and lower transportation costs.

    The boxes may be packed in plastic bags, inner cartons, or export cartons depending on the order quantity and shipping requirements.

    The packing method should protect the PET surfaces from scratches, dust, moisture, pressure, and movement during transportation.

    Arrange Shipping and Delivery

    After the finished boxes are packed, the shipment can be arranged according to the agreed delivery method.

    The buyer may choose express delivery, air freight, sea freight, or another shipping method depending on the order quantity, destination, budget, and required delivery time.

    Before shipment, both sides should confirm the delivery address, carton quantity, gross weight, shipping documents, and estimated transit time.

    Production lead time and shipping time should be calculated separately so that the buyer can plan the final delivery schedule more accurately.

    How Buyers Can Make the Order Process More Efficient

    A clear and efficient order process depends on timely communication and complete project information.

    Buyers can reduce unnecessary delays by preparing the main specifications early, reviewing documents carefully, and confirming important details before production begins.

    Provide Complete Information Early

    Provide the product dimensions, box size, quantity, material, printing requirements, product weight, and expected delivery schedule as early as possible.

    Complete information allows the manufacturer to evaluate the project, prepare a more accurate quotation, and recommend a suitable box structure.

    If important details are missing, additional communication and revisions may delay quotation, sampling, and production.

    Confirm Dimensions and Structure Before Artwork

    The box dimensions and structure should be confirmed before the final artwork is prepared.

    If the box size, closure style, hanging tab, or insert changes after the artwork is completed, the dieline and printing layout may need to be revised.

    Confirming the structural details first can reduce repeated adjustments and help the project move into sampling more efficiently.

    Review Artwork and Samples Carefully

    Buyers should check the artwork and sample carefully before giving final approval.

    Important details include the box dimensions, material, transparency, printing position, text, colors, folding performance, product fit, and overall appearance.

    Whenever possible, provide complete feedback in one round instead of making separate changes at different stages.

    Clear and timely approval helps reduce delays before mass production.

    Confirm the Delivery Schedule in Advance

    The expected delivery date should be discussed before the order is finalized.

    Buyers should consider both production lead time and shipping time, especially for printed boxes, large orders, or overseas deliveries.

    Planning the order early gives the factory enough time for artwork confirmation, sampling, production, inspection, packing, and shipping.

    For urgent projects, always confirm whether the required schedule is realistic before placing the order.

    Common Questions About the PET Packaging Box Order Process

    Is a Sample Required Before Mass Production?

    A physical sample is not always required, but it is recommended for new box structures, printed packaging, complex inserts, or products with specific fitting requirements.

    A sample allows the buyer to check the dimensions, material, transparency, printing, folding performance, and overall appearance before the full order is produced.

    For repeat orders with the same approved specifications, sampling may not be necessary unless the design or material has changed.

    When Does the Production Lead Time Begin?

    The production lead time normally begins after the final box specifications, artwork, sample, quantity, payment terms, and other order details have been confirmed.

    Time spent waiting for artwork revisions, sample approval, missing information, or payment confirmation is usually not included in the production period.

    For this reason, buyers should confirm all details clearly before asking the factory to arrange production.

    Can Changes Be Made After Production Starts?

    Changes made after production begins may be difficult or may result in additional cost, material waste, and delays.

    If the box size, artwork, printing color, structure, or quantity needs to be changed, the factory should be informed as early as possible.

    All important specifications should therefore be checked carefully before the final production approval is given.

    Final Thoughts

    The PET packaging box order process includes several important stages, from the initial inquiry and quotation to artwork confirmation, sampling, mass production, inspection, packing, and delivery.

    A successful custom packaging order depends on clear specifications, timely communication, careful approval, and realistic production and shipping schedules.

    Buyers can make the process more efficient by providing complete information early, confirming the box structure before artwork, reviewing samples carefully, and avoiding unnecessary changes after production begins.

    For the most accurate quotation and production plan, the final order should always be evaluated according to the specific product, box structure, quantity, printing requirements, and delivery schedule.

    If you are planning a custom PET packaging box order, contact us with your product size, required quantity, printing details, and expected delivery schedule. We can help review the project and guide you through the complete order process.

  • How to Choose the Right PET Packaging Box Closure Style

    How to Choose the Right PET Packaging Box Closure Style

    Choosing the right PET packaging box closure style is important because the closure affects how easily the box can be assembled, how securely it holds the product, and how the packaging performs during transport and retail display.

    Different products may require different closure structures. A lightweight cosmetic item may only need a simple tuck-end closure, while heavier products may require a stronger bottom-locking structure.

    The best closure style depends on several factors, including product weight, box size, PET thickness, assembly requirements, and whether the package needs to hang on a retail display.

    In this guide, we will explain the most common PET packaging box closure styles and how to choose the right option for your product.

    What Is a PET Packaging Box Closure Style?

    A PET packaging box closure style refers to the way the top, bottom, or opening of the box is designed to close and hold the package together.

    The closure structure can affect box strength, assembly speed, product security, appearance, and production cost.

    Some PET boxes use simple tuck flaps, while others use locking bottoms, snap-lock structures, hanging tabs, or additional inserts depending on the product and packaging requirements.

    Choosing the correct closure style helps ensure that the box is practical to assemble and suitable for the weight and shape of the product inside.

    Common PET Packaging Box Closure Styles

    PET packaging boxes can use different closure structures depending on the product weight, box size, display requirements, and assembly method.

    The following are some of the most common closure styles used for custom PET folding boxes.

    Tuck-End Closure

    A tuck-end closure is one of the most common and simple closure styles for PET folding boxes.

    The top or bottom flap is inserted into the box opening to keep the package closed. This structure is easy to understand, relatively quick to assemble, and suitable for many lightweight products.

    Tuck-end closures are commonly used for cosmetics, phone accessories, small gifts, and other retail products where the product weight is not too heavy.

    For heavier products, the bottom structure may need additional locking support to prevent the box from opening during handling or transport.

    Snap-Lock Bottom

    A snap-lock bottom uses several bottom flaps that fold and lock together to create a stronger base.

    Compared with a simple tuck-end bottom, this structure can provide better support for products with more weight.

    It is often used when the package needs additional bottom strength but still requires manual assembly.

    The exact structure should be tested based on the product weight, box dimensions, and PET thickness before mass production.

    Auto-Lock Bottom

    An auto-lock bottom is designed so that the bottom panels automatically move into position when the box is opened and formed.

    Compared with a manual snap-lock bottom, this structure can help improve assembly efficiency, especially when a larger number of boxes need to be packed.

    It can also provide better bottom support for products that are heavier than those typically packed in a simple tuck-end box.

    However, the structure is more complex and should be designed according to the box size, PET thickness, product weight, and packing method.

    Hanging Tab Closure

    A hanging tab allows the PET packaging box to be displayed on retail hooks or pegboards.

    This structure is commonly used for phone accessories, small electronic accessories, toys, hardware items, and other products that are often sold in hanging displays.

    The hanging area must be strong enough to support the total weight of the packaged product.

    For heavier items, the hanging tab structure and PET thickness should be carefully evaluated to reduce the risk of tearing or deformation during retail display.

    For phone accessories and other small retail products, you can also review our custom PET packaging boxes for phone accessories guide.

    Insert or Inner Tray Support

    Some PET packaging boxes use an insert or inner tray together with the outer folding box.

    The insert helps hold the product in the correct position and can reduce movement inside the package during handling and transport.

    This structure is useful for products that need better presentation, added protection, or more stable positioning inside the box.

    The insert design should match the product dimensions and the outer box structure so that the package remains easy to assemble and does not place too much pressure on the PET panels.

    You can also review our PET packaging box styles guide to compare different box structures before choosing the final design.

    How to Choose the Right PET Packaging Box Closure Style

    The right PET packaging box closure style should be selected based on how the package will be used, assembled, displayed, and transported.

    There is no single closure structure that is suitable for every product. The best option depends on the product weight, box dimensions, PET thickness, assembly speed, retail display method, and the level of support required.

    Consider the Product Weight

    Product weight is one of the most important factors when choosing a closure structure.

    For lightweight products, a simple tuck-end closure may provide enough support and can keep the packaging easy to assemble.

    For heavier products, a snap-lock bottom or auto-lock bottom may provide better support and reduce the risk of the bottom opening during handling.

    The closure design should always be tested together with the actual product before mass production.

    Match the Closure to the Box Size

    Box size can also affect how well a closure structure performs.

    A closure that works well on a small PET box may not provide the same strength on a larger box, especially when the product is heavier or the PET panels are longer.

    Larger boxes may require stronger locking structures, wider flaps, or additional support to maintain stability.

    The final closure design should be matched to both the box dimensions and the product inside.

    Consider PET Thickness

    PET thickness can affect both the strength of the box and how well the closure structure works.

    Thicker PET material can provide better rigidity and support, but it may also require adjustments to crease lines, flap dimensions, and locking positions.

    If the PET is too thin for a heavier product, the box may deform or the closure may not remain secure during handling.

    The material thickness should therefore be selected together with the box size, product weight, and closure structure rather than considered separately.

    For more details, read our guide on choosing the right PET packaging box thickness for different products.

    Consider Assembly Efficiency

    Assembly speed is another important factor, especially for larger production runs.

    Simple tuck-end closures are generally easy to fold and close manually, while snap-lock bottoms require more steps during assembly.

    Auto-lock bottoms can improve packing efficiency because the bottom forms more quickly when the box is opened.

    When choosing a closure style, buyers should consider not only box strength but also how much time and labor will be required during packing.

    Consider Retail Display Requirements

    The way the product will be displayed in stores can also affect the choice of closure style.

    If the package will stand on a shelf, the bottom structure should provide enough stability to keep the box upright.

    If the package needs to hang on hooks or pegboards, a hanging tab or reinforced hanging structure may be required.

    For retail packaging, the closure should also help keep the product secure while maintaining a clean and attractive appearance on display.

    Test the Structure Before Mass Production

    Before mass production, the final closure structure should be tested with the actual product whenever possible.

    The test should confirm that the box can be assembled smoothly, the closure stays secure, the product fits correctly, and the packaging can withstand normal handling.

    If the box uses a locking bottom, hanging tab, or insert, these areas should be checked carefully because they directly affect product support and packaging performance.

    A physical sample can help identify structural problems before they are repeated across the full production run.

    You can also review our PET packaging box sample inspection guide before approving the final structure for mass production.

    Quick Comparison of PET Packaging Box Closure Styles

    Different closure styles are suitable for different packaging needs.

    A simple tuck-end closure is usually suitable for lightweight products and easy manual assembly, while snap-lock and auto-lock bottoms provide stronger support for heavier products.

    Hanging tab structures are better for retail hook displays, while inserts or inner trays help keep products in position and improve presentation.

    The final choice should balance product weight, box size, PET thickness, assembly efficiency, and retail display requirements.

    • Tuck-end closure: Suitable for lightweight products and simple assembly
    • Snap-lock bottom: Provides stronger bottom support
    • Auto-lock bottom: Helps improve packing efficiency
    • Hanging tab closure: Suitable for hook or pegboard displays
    • Insert or inner tray: Helps improve product positioning and presentation

    Final Thoughts

    Choosing the right PET packaging box closure style is an important part of creating packaging that is secure, practical, and easy to use.

    The best closure structure depends on the product weight, box dimensions, PET thickness, assembly method, and retail display requirements.

    Before mass production, the final structure should be tested with the actual product whenever possible to confirm that the box can be assembled smoothly and that the closure provides enough support.

    If you are unsure which closure style is suitable for your product, providing the product dimensions, weight, packaging requirements, and expected display method can help the manufacturer recommend a more appropriate structure.

    If you are planning a custom PET packaging box project, contact us with your product size, weight, quantity, and packaging requirements. We can help evaluate the box structure and recommend a suitable closure style for your project.

  • Custom PET Packaging Box Lead Time: How Long Does Production Take?

    Custom PET Packaging Box Lead Time: How Long Does Production Take?

    For buyers ordering custom packaging, production time is often just as important as price and quality. Knowing the expected PET packaging box lead time can help you plan product launches, manage inventory, and avoid delays.

    The production time for custom PET packaging boxes can vary depending on the box structure, printing requirements, order quantity, artwork confirmation, and whether sampling is required before mass production.

    For relatively simple clear PET folding boxes using available materials, production can sometimes be completed in around 7 days. Printed PET packaging boxes usually require more time because printing and additional processing are involved, with a typical production time of approximately 15–30 days after all details are confirmed.

    However, these are only general estimates. The actual lead time for each order should be confirmed based on the specific packaging requirements.

    In this guide, we will explain the typical production timeline for custom PET packaging boxes, the main factors that can affect lead time, and how buyers can help speed up the ordering process.

    How Long Is the Typical PET Packaging Box Lead Time?

    For most custom PET packaging box orders, the production lead time depends on whether the box is clear or printed, the quantity required, and whether the structure has already been confirmed.

    For simple clear PET folding boxes using available material, production may take approximately 7 days after the box size, structure, and order details are confirmed.

    For printed PET packaging boxes, the typical production lead time is around 15–30 days because additional steps such as printing, drying, cutting, creasing, folding, and quality inspection may be required.

    Large-volume orders or packaging with more complex printing and structural requirements may require additional production time.

    The lead time generally begins after all important details have been confirmed, including:

    • Box dimensions
    • PET material and thickness
    • Box structure
    • Printing artwork
    • Order quantity
    • Sample approval, if required

    Confirming these details clearly before production can help reduce delays and make the entire manufacturing process more efficient.

    What Factors Affect PET Packaging Box Lead Time?

    Several factors can affect the PET packaging box lead time. Even when the box structure looks simple, production time may change depending on materials, printing, quantity, artwork confirmation, and sampling requirements.

    Understanding these factors before placing an order can help buyers plan their schedule more accurately and reduce unnecessary delays.

    Box Structure and Size

    Simple folding box structures are usually faster to produce than more complex packaging designs.

    If the box includes special locking structures, inserts, trays, or unusual dimensions, additional time may be required for drawing preparation, testing, cutting, and production setup.

    Larger box sizes may also require different material arrangements and cutting plans, which can affect the overall production schedule.

    Printing Requirements

    Printing is one of the main factors that can extend the production schedule for custom PET packaging boxes.

    Clear PET boxes without printing are generally faster to produce. Printed boxes may require additional processes such as artwork checking, plate preparation, printing, drying, and inspection before cutting and creasing.

    The production time can also vary depending on the printing method, number of colors, printing area, and whether special finishes are required.

    To avoid delays, buyers should provide final artwork files and confirm all printing details before mass production begins.

    You can also compare different PET packaging printing methods before choosing the most suitable option for your project.

    Order Quantity

    Order quantity can also affect the production schedule.

    A smaller order is generally easier to arrange, while a larger production run may require more material preparation, cutting, creasing, folding, gluing, packing, and quality inspection.

    For high-volume orders, the factory may need to arrange production in batches to maintain consistent quality and avoid mistakes.

    Because production capacity can vary during busy periods, buyers with larger orders should confirm the expected lead time before placing the order.

    Artwork and File Confirmation

    Incomplete or incorrect artwork files can delay the start of production.

    Before printing begins, the artwork, colors, logo position, text content, and dieline should be checked and confirmed. If revisions are required, the production schedule may be pushed back until the final files are approved.

    Providing complete and production-ready artwork at the beginning can help shorten the preparation stage and reduce unnecessary back-and-forth communication.

    For more details, read our guide on preparing artwork and dielines for custom PET packaging boxes.

    Sample Approval

    If a physical sample is required before mass production, the sample approval process will add time to the overall project schedule.

    The factory may need to prepare the sample, send photos or ship the physical sample to the buyer, wait for feedback, and make revisions if necessary.

    Mass production should normally begin only after the sample, structure, dimensions, material, and printing details are approved.

    To reduce delays, buyers should review samples carefully and provide clear feedback as quickly as possible.

    Before approving production, you can review our PET packaging box sample inspection guide to check the key details that should be confirmed.

    How Can Buyers Reduce PET Packaging Box Lead Time?

    Buyers can often reduce unnecessary delays by preparing the required information early and responding quickly during the confirmation process.

    Although the factory controls the actual production schedule, clear communication and complete order details can help the project move forward more smoothly.

    Confirm Box Size and Structure Early

    Before production begins, confirm the product dimensions, box dimensions, and packaging structure as early as possible.

    Frequent changes to the box size or structure after drawings have been prepared may require the dieline to be adjusted and checked again.

    Providing accurate product measurements at the beginning can help reduce revisions and shorten the preparation stage.

    If you are still confirming the correct dimensions, read our PET packaging box measurement guide before finalizing the box size.

    Prepare Complete Artwork Files

    Final artwork files should be prepared and confirmed before production begins.

    If logos, text, colors, or printing positions are changed repeatedly, the factory may need to check or revise the artwork again, which can delay the production schedule.

    Providing complete and production-ready files from the beginning can help reduce revisions and allow printing arrangements to start sooner.

    Confirm Samples Without Unnecessary Delay

    When a sample is required, review it carefully as soon as possible after receiving the photos or physical sample.

    Check the box size, structure, material, printing, folding performance, and overall appearance, then provide clear feedback in one round whenever possible.

    Repeated changes after sample approval can extend the project timeline, so all important details should be confirmed before mass production begins.

    Provide Complete Order Information

    Before the factory arranges production, provide all important order details as completely as possible.

    This may include the box size, PET thickness, box structure, printing requirements, order quantity, packing method, and expected delivery schedule.

    Missing information can slow down quotation, sampling, material preparation, and production planning.

    Clear and complete order information helps the factory evaluate the project more quickly and arrange the production schedule more accurately.

    If you are preparing an inquiry, read our custom PET packaging box quotation requirements guide to see what information should be provided.

    Plan Orders in Advance

    Whenever possible, buyers should place custom packaging orders before the boxes are urgently needed.

    Production schedules may change during busy periods, and printed or large-volume orders usually require more preparation time than simple clear boxes.

    Planning in advance gives both the buyer and the factory more time for artwork confirmation, sampling, production, inspection, and shipping arrangements.

    For urgent projects, always confirm the available production schedule with the factory before placing the order.

    Does PET Packaging Box Lead Time Include Shipping Time?

    Production lead time and shipping time are usually calculated separately.

    The production lead time refers to the time required to prepare and manufacture the PET packaging boxes after all order details are confirmed.

    Shipping time depends on the destination, shipping method, customs clearance, and logistics arrangements. Express delivery is generally faster, while air freight or sea freight may require more time.

    For overseas orders, buyers should consider both production time and shipping time when planning the final delivery schedule.

    Before placing an order, it is recommended to confirm the estimated production completion date and discuss the available shipping options separately.

    Final Thoughts

    The PET packaging box lead time depends on several factors, including box structure, printing requirements, order quantity, artwork preparation, and sample approval.

    Simple clear PET folding boxes may require less production time, while printed, complex, or large-volume orders usually need a longer schedule.

    To avoid unnecessary delays, buyers should prepare complete order information, confirm artwork and samples promptly, and place orders as early as possible.

    For the most accurate lead time, always confirm the current production schedule based on your specific packaging requirements before placing the final order.

    If you are planning a custom PET packaging box project, contact us with your box size, quantity, printing requirements, and expected delivery schedule. We can help evaluate the project and confirm the estimated production lead time.

  • PET Packaging Box Samples: What to Check Before Mass Production

    PET Packaging Box Samples: What to Check Before Mass Production

    PET packaging box samples are an important step before mass production because they allow buyers to check the size, structure, material, folding quality, printing, and overall appearance of the packaging.

    A sample can reveal problems that may not be obvious from drawings or digital artwork alone. For example, the box may be too tight, too loose, difficult to assemble, easy to scratch, or unsuitable for the product weight.

    In this guide, we explain what buyers should check when reviewing PET packaging box samples and which details should be confirmed before approving mass production.

    Why PET Packaging Box Samples Matter

    A physical sample helps confirm whether the proposed packaging design works in real use. It allows the buyer to insert the actual product, test the folding structure, check transparency, inspect crease lines, and evaluate the overall retail presentation.

    For custom PET packaging, even small differences in dimensions, material thickness, crease position, or box structure can affect the final result. A sample provides an opportunity to identify these problems before they are repeated across hundreds or thousands of production pieces.

    Samples are also useful for checking printing position, color coverage, white ink, inserts, hanger tabs, locking flaps, and other custom details.

    The goal of sample approval is not only to confirm appearance. Buyers should also confirm functionality, product fit, durability, packing efficiency, and whether the approved sample can be used as a clear reference for mass production.

    PET packaging box sample for product fit testing

    Check the Product Fit First

    The first thing to check is whether the actual product fits the sample correctly. The box should not be so tight that the product is difficult to insert or remove, and it should not be so loose that the product moves excessively during handling or transportation.

    Check the fit using the complete product, including accessories, inserts, cables, caps, handles, or other protruding parts. If the package includes several items, test them in the same arrangement that will be used for mass production.

    The product should sit in the intended position without causing the PET panels to bulge, bend, or remain under constant pressure. At the same time, the internal clearance should be small enough to maintain a neat retail appearance.

    If an insert, tray, or divider is included, confirm that it holds the product securely and does not make the box difficult to assemble.

    Product Fit Checklist

    • The product can be inserted and removed smoothly
    • The box is not excessively tight
    • The product does not move too much inside the box
    • Accessories fit in the intended position
    • Inserts or trays hold the product securely
    • PET panels are not pushed outward by the product
    • The product orientation matches the display design
    • The final packed appearance looks balanced

    If you are still confirming the correct box dimensions, read our PET packaging box measurement guide.

    Check the PET Thickness and Box Strength

    The PET thickness should match the product weight, box dimensions, structure, and display method. A sample that feels too soft may bend, collapse, or lose its shape during packing and transportation.

    A box that is excessively thick may feel stronger, but it can also be harder to fold and may develop stronger white crease marks or spring-back along the folding lines.

    When checking PET packaging box samples, hold the assembled box in your hands and apply light pressure to the side panels, bottom, and corners. The structure should remain stable without excessive deformation.

    If the box includes an auto-lock bottom, tuck-end structure, hanger tab, or large transparent panel, check whether these areas provide enough support for the intended product.

    Thickness and Strength Checklist

    • The PET thickness matches the product weight
    • Side panels do not collapse too easily
    • The bottom provides enough support
    • Large transparent panels remain stable
    • Corners keep their intended shape
    • The box does not feel unnecessarily rigid
    • Fold lines do not show excessive spring-back
    • The final structure remains stable after assembly

    For more guidance, read our PET packaging box thickness guide.

    PET packaging box sample crease and folding quality

    Inspect Crease Lines and Folding Quality

    Crease lines should allow the PET box to fold smoothly without cracking, excessive whitening, distortion, or strong spring-back.

    When reviewing PET packaging box samples, fold and unfold the main panels carefully and check whether the crease lines are positioned correctly. The box should assemble into the intended shape without requiring excessive force.

    A slight visible fold line may be normal on clear PET, especially at sharp folds. However, strong white crease marks, cracks, split corners, or uneven folding usually indicate that the crease design, material thickness, folding direction, or machine settings should be adjusted.

    Pay special attention to corners, locking tabs, hanger holes, and areas where several crease lines meet because these points often experience higher stress.

    Crease and Folding Checklist

    • Crease lines are straight and accurately positioned
    • Panels fold in the intended direction
    • The box can be assembled without excessive force
    • No visible cracks appear along fold lines
    • White crease marks remain within an acceptable level
    • Corners do not split or distort
    • Locking tabs fold and close correctly
    • The box does not spring open after assembly
    • Repeated opening does not cause immediate damage

    For more details about scratches, cracks, and white fold lines, read our PET packaging box quality problems guide.

    Check the Box Structure and Assembly

    The box structure should be easy to assemble and suitable for the way the product will be packed, displayed, opened, and removed.

    When reviewing PET packaging box samples, assemble the box several times and check whether each flap, locking tab, bottom panel, and hanger section works as intended. The structure should close securely without excessive force, misalignment, or deformation.

    For boxes with auto-lock bottoms, snap-lock bottoms, tuck-end closures, or hanger tabs, check the specific functional areas carefully. Weak locking points or inaccurate die-cutting may cause the box to open unexpectedly or sit unevenly on the shelf.

    The structure should also match the intended packing process. A design that works well for manual assembly may not be suitable for automatic packing, while a complex structure may increase packing time and labor cost.

    Structure and Assembly Checklist

    • All flaps fold in the correct direction
    • Locking tabs engage securely
    • The bottom remains closed under product weight
    • The box stands evenly when assembled
    • Hanger tabs align correctly with retail hooks
    • Openings are easy for the customer to use
    • Glue areas remain secure when applicable
    • The box can be assembled consistently
    • The structure matches the intended packing method

    If you are still comparing different structures, read our PET packaging box styles guide.

    Inspect Surface Clarity and Scratches

    Clear PET packaging should look clean, transparent, and consistent under normal viewing conditions. Scratches, dust, fingerprints, or cloudy areas can reduce the visual quality of the package, especially when the product relies on transparency for display.

    When reviewing PET packaging box samples, inspect the surface under good lighting and from several angles. Some marks may only become visible when light reflects across the panel.

    If protective film is applied, confirm whether the marks are on the film or on the actual PET surface. The film should protect the box during production and transportation without leaving residue after removal.

    Buyers should also consider how sensitive the surface appearance is for the final product. Premium cosmetics, gifts, and retail display packaging may require stricter visual standards than ordinary protective packaging.

    Surface Quality Checklist

    • Transparent panels look clear and consistent
    • No serious scratches are visible
    • No dust or fingerprints are trapped inside the box
    • Protective film is applied correctly when required
    • No adhesive residue remains after film removal
    • Printed and unprinted areas remain clean
    • The surface does not show unusual cloudiness
    • The appearance meets the intended retail standard
    Printed PET packaging box sample for artwork inspection

    Check Printing Quality and Artwork Position

    Printed PET packaging box samples should be checked for color accuracy, artwork position, ink coverage, adhesion, and consistency with the approved design.

    Because PET is transparent, printing often interacts with clear areas, white ink, reverse printing, or other special effects. Small positioning errors can become very visible if logos, text, or graphics do not align correctly with the box panels, crease lines, or transparent windows.

    Check whether the printed colors match the approved artwork as closely as possible, and confirm that important text, barcodes, logos, and product information are placed correctly.

    The printed surface should also be tested for scratching, peeling, smudging, or poor adhesion. If the box will be folded after printing, inspect the printed areas near crease lines to make sure the ink is not damaged during assembly.

    Printing Sample Checklist

    • Artwork position matches the approved design
    • Logos and text are aligned correctly
    • Printed colors are consistent
    • White ink coverage is sufficient when required
    • Transparent areas remain clear
    • No obvious smudging or missing ink appears
    • Ink does not scratch or peel easily
    • Printing remains stable near fold lines
    • Barcodes and small text are readable

    For a comparison of available printing processes, read our PET packaging printing methods guide.

    Check Inserts, Trays, and Accessories

    If the PET packaging box includes an insert, tray, divider, or additional accessory, these parts should be checked together with the complete packaging sample.

    The insert should hold the product securely without creating excessive pressure on the PET box. It should also keep the product in the intended display position and prevent unnecessary movement during handling and transportation.

    For multi-product packaging, confirm that each item has enough space and that the arrangement remains neat after the box is moved or turned. Accessories such as cables, tools, cards, or promotional items should also fit in the planned position.

    The insert material, thickness, shape, and color should match the approved design. If the insert will be supplied separately, confirm that the final dimensions are compatible with the PET box.

    Insert and Accessory Checklist

    • The insert fits correctly inside the PET box
    • The product is held securely
    • Accessories remain in the intended position
    • The insert does not deform the outer box
    • Multiple products do not collide with each other
    • The final arrangement looks neat and balanced
    • Insert dimensions match the approved design
    • The insert can be assembled or packed efficiently

    Test the Packaging Under Real Use Conditions

    A PET packaging box sample should be tested under conditions that are close to actual use. A box may look correct when empty but behave differently after the product is inserted, stacked, moved, opened, or displayed.

    Pack the actual product into the sample and handle it the same way it will be handled during normal packing, storage, transportation, and retail display. Check whether the box keeps its shape and whether the product remains in the intended position.

    If the packaging will be opened and closed by customers, test the opening process several times. If the box will hang on a retail hook, test the hanger tab with the actual product weight.

    Real-use testing helps identify structural or functional problems before mass production and gives buyers a more reliable basis for sample approval.

    Real-Use Test Checklist

    • Pack the actual product into the sample
    • Carry and handle the packed box normally
    • Open and close the box several times
    • Check whether the structure keeps its shape
    • Confirm that the product remains in position
    • Test hanger tabs when applicable
    • Check bottom strength under actual product weight
    • Observe whether scratches or deformation appear during handling
    • Confirm that the packaging still looks suitable for retail display

    Compare the Sample With the Approved Dieline and Artwork

    The physical sample should be compared carefully with the approved dieline and artwork before mass production.

    Check whether the cutting lines, crease positions, glue areas, hanger holes, locking tabs, and panel dimensions match the approved structure. Even a small structural difference can affect product fit, assembly, or retail presentation.

    For printed packaging, compare the sample with the final artwork file. Confirm that logos, text, barcodes, transparent areas, white ink, and other design elements are positioned on the correct panels.

    If any changes were made during sampling, make sure the latest dieline and artwork files are clearly identified and approved. Mass production should always follow the final approved version rather than an earlier draft.

    Dieline and Artwork Comparison Checklist

    • Box dimensions match the approved dieline
    • Cutting and crease lines are correctly positioned
    • Glue areas are in the correct location
    • Hanger holes and locking tabs match the design
    • Artwork is placed on the correct panels
    • Logos, text, and barcodes are positioned correctly
    • Transparent and printed areas match the approved artwork
    • The latest file version is clearly identified
    • Any sample changes are reflected in the final production files

    Record Sample Approval Details Before Mass Production

    Once the PET packaging box sample has been checked and accepted, the approval details should be recorded clearly before mass production begins.

    The approved sample, final dieline, artwork file, material thickness, printing requirements, box structure, inserts, and packing method should all refer to the same final version.

    If any small changes are accepted during sample review, record them in writing rather than relying only on verbal confirmation. This reduces the risk of mass production following an outdated file or an earlier sample version.

    For important projects, keep one approved physical sample as a reference. The manufacturer and buyer can use it to compare mass-produced boxes during final quality inspection.

    Sample Approval Record Checklist

    • Approved sample version
    • Final dieline version
    • Final artwork version
    • PET material and thickness
    • Confirmed box dimensions
    • Printing colors and finishing requirements
    • Insert or tray specifications
    • Accepted crease and folding appearance
    • Packing method
    • Approved production quantity
    • Date of final sample approval
    • Any special quality requirements

    Final Checks Before Approving Mass Production

    Before approving mass production, review the complete PET packaging box sample one final time using the actual product and the final approved specifications.

    The goal is to confirm that no important detail has been missed between product fit, material thickness, structure, folding quality, printing, inserts, and packing requirements.

    Buyers should also make sure that any changes made during sampling have been updated in the final dieline, artwork, and production instructions.

    Once all details are confirmed, the approved sample can be used as the reference standard for mass production and final quality inspection.

    Final Sample Approval Checklist

    • Product fit is correct
    • PET thickness is approved
    • Box structure works as intended
    • Crease and folding quality are acceptable
    • Surface clarity meets the required standard
    • Printing and artwork position are approved
    • Inserts and accessories fit correctly
    • The package passes real-use testing
    • Final dieline and artwork versions are confirmed
    • Packing and shipping requirements are clear
    • All requested changes have been recorded
    • The physical sample is approved for mass production

    Frequently Asked Questions

    How many PET packaging box samples should be checked before mass production?

    For a simple custom project, checking several representative samples is usually more useful than reviewing only one piece. Buyers should compare dimensions, folding quality, printing, surface appearance, and assembly consistency across the samples.

    Should the actual product be tested inside the sample?

    Yes. The actual product should be packed into the PET packaging box sample whenever possible. This helps confirm fit, clearance, product movement, insert compatibility, bottom strength, and the final retail appearance.

    Can a plain sample be approved before the printed sample?

    Yes. A plain sample can be used to confirm box size, structure, PET thickness, folding quality, and product fit. Printing, color, white ink, and finishing details should then be approved separately when a printed sample is required.

    What happens if the sample needs changes?

    Any required changes should be recorded clearly and reflected in the final dieline, artwork, material specification, or production instructions. The revised version should be confirmed before mass production begins.

    Need PET Packaging Box Samples Before Mass Production?

    Reviewing PET packaging box samples before mass production helps reduce problems with product fit, material thickness, folding quality, printing, inserts, and final assembly.

    Send us your product dimensions, weight, photos, box structure, printing requirements, and expected order quantity. If you already have a dieline or reference sample, include it for review.

    For many custom PET packaging projects, we can prepare approximately 10–20 plain samples for evaluation, while the buyer pays the courier cost. Printed sample requirements can be confirmed separately based on the printing process and design.

  • How to Prevent Scratches, Cracks, and White Crease Marks on PET Packaging Boxes

    How to Prevent Scratches, Cracks, and White Crease Marks on PET Packaging Boxes

    Clear PET packaging boxes are valued for their transparency and clean retail appearance, but this also makes surface and folding defects easier to notice. Scratches, cracks, and white crease marks can reduce product visibility and make the packaging look damaged or poorly manufactured.

    Common PET packaging box quality problems may be caused by unsuitable material thickness, incorrect creasing, excessive folding pressure, poor handling, printing damage, or insufficient protection during packing and transportation.

    In this guide, we explain why these problems occur, how manufacturers can reduce them during production, and what buyers should confirm before approving samples and mass production.

    Why Clear PET Packaging Shows Defects Easily

    Clear PET has a smooth and reflective surface, so even small scratches, dust marks, fingerprints, or pressure damage can be visible under light. Unlike printed paper packaging, transparent material cannot easily hide surface defects.

    Creasing and folding quality are also important because PET must bend along accurately prepared lines. If the crease is too shallow, too deep, too narrow, or incorrectly positioned, the material may resist folding, turn white, crack, or lose its original shape.

    The final appearance is affected by several factors, including PET grade, sheet thickness, crease design, machine settings, storage conditions, handling methods, printing coverage, and box structure.

    Because these factors interact with each other, quality control should begin with material selection and continue through cutting, creasing, folding, gluing, inspection, packing, and shipment.

    Common Scratches on PET Packaging Boxes

    Scratches are one of the most visible PET packaging box quality problems because the clear surface reflects light and shows even small marks.

    Scratches may occur when PET sheets rub against each other, contact rough machine surfaces, slide across dirty worktables, or are handled without enough protection. Printed areas can also be damaged if the ink has not cured properly or if finished boxes are packed too tightly.

    Some minor marks may come from the removable protective film rather than the PET surface itself. For this reason, inspection should confirm whether the defect is on the film or on the actual material before the boxes are rejected.

    Using clean equipment, smooth work surfaces, protective film, careful stacking, and suitable packing materials can greatly reduce surface damage during production and transportation.

    Common Causes of PET Surface Scratches

    • PET sheets rubbing directly against each other
    • Dust, metal particles, or debris on worktables
    • Rough machine guides or conveyor surfaces
    • Dragging boxes instead of lifting them
    • Improper stacking after die-cutting
    • Insufficient protective film
    • Poorly cured printing ink
    • Excessive pressure during packing
    • Loose movement inside shipping cartons

    How to Reduce Scratches

    • Keep worktables and machine surfaces clean
    • Use protective film when required
    • Separate finished parts with clean paper or film
    • Avoid dragging PET sheets and folded boxes
    • Wear clean gloves during final handling
    • Confirm that printing ink is fully cured
    • Use suitable carton packing and internal protection
    • Inspect surfaces under strong light before shipment
    Scratches and surface defects on PET packaging boxes

    Why PET Packaging Boxes Crack During Folding

    Cracking usually occurs when the PET sheet cannot bend smoothly along the crease line. This may be caused by unsuitable material, excessive crease depth, incorrect crease width, low temperature, sharp folding angles, or repeated folding in the same area.

    PET becomes less flexible in cold conditions, so material that folds normally in a warm workshop may crack more easily after cold storage or winter transportation. Thick PET can also require a wider or more suitable crease than thin material.

    Cracks may appear directly on the crease line, at the corner where several folds meet, or near die-cut openings and hanger holes. These areas experience concentrated stress and therefore require accurate structural design and production control.

    The risk can be reduced by testing the PET grade and thickness, adjusting the creasing settings, avoiding excessively sharp corners, and approving a physical sample before mass production.

    Common Causes of Cracking

    • PET material with insufficient folding toughness
    • Crease lines that are too deep or too narrow
    • Incorrect creasing pressure
    • Unsuitable crease width for the PET thickness
    • Folding at very low temperatures
    • Repeated folding and reopening
    • Sharp corners with concentrated stress
    • Die-cut holes positioned too close to crease lines
    • Incorrect folding direction
    • Damaged or aged PET sheets

    How to Reduce Cracking During Folding

    • Match the crease design to the PET thickness
    • Test the material before mass production
    • Adjust creasing pressure and machine settings
    • Allow cold PET sheets to reach room temperature before folding
    • Avoid unnecessary repeated folding
    • Use rounded transitions at high-stress corners
    • Keep holes and cutouts away from critical crease areas
    • Confirm the correct folding direction
    • Approve a physical sample with the final material

    What Causes White Crease Marks on PET Boxes

    White crease marks appear when the PET material is stressed during creasing or folding and the fold area loses some of its original transparency. The line may look cloudy, pale, or slightly opaque even when the material has not fully cracked.

    This problem is often caused by excessive creasing pressure, a crease that is too narrow, unsuitable PET thickness, repeated folding, low material temperature, or an incorrect folding direction.

    A slight visible line may be normal on some clear PET structures, especially at sharp 180-degree folds. However, severe whitening usually indicates that the crease design or production settings should be adjusted.

    The goal is not always to eliminate every visible fold line, but to control the crease so that the box folds accurately without strong whitening, cracking, distortion, or loss of transparency.

    Common Causes of White Crease Marks

    • Creasing pressure is too high
    • The crease channel is too narrow
    • PET thickness does not match the crease design
    • The material is folded in the wrong direction
    • The same crease is folded repeatedly
    • PET sheets are too cold during folding
    • The folding angle is too sharp
    • Stress is concentrated near corners or cutouts
    • The selected PET grade has limited folding performance

    How to Reduce White Crease Marks

    • Match the crease width and depth to the PET thickness
    • Reduce excessive creasing pressure
    • Test both folding directions before production
    • Fold the material only as much as necessary
    • Allow cold PET sheets to reach room temperature
    • Avoid sharp structural transitions where possible
    • Use a suitable PET grade with good folding performance
    • Approve the crease appearance on a physical sample
    White crease marks on folded PET packaging box

    How PET Thickness Affects Folding Quality

    PET thickness affects stiffness, crease resistance, folding force, box strength, and the visibility of fold lines. A thicker sheet may provide better support for heavier products, but it usually requires a wider and more carefully controlled crease.

    If a thick PET sheet is creased too narrowly or folded too sharply, stress may concentrate along the fold and cause whitening, cracking, or spring-back. A very thin sheet is easier to fold, but it may deform, collapse, or lose its shape during packing and transportation.

    The correct thickness should therefore be selected according to the product weight, box dimensions, structure, display method, and required appearance. Thickness should not be increased simply to make the box feel stronger because excessive material may create unnecessary folding difficulty and cost.

    The final crease design and machine settings should always be tested using the actual production thickness rather than a different sample material.

    Thickness-Related Folding Problems

    • Thick PET requiring excessive folding force
    • Narrow creases causing whitening or cracking
    • Thin PET panels losing rigidity
    • Incorrect thickness used during sampling
    • Spring-back after folding
    • Uneven folds between different panels
    • Material deformation near large transparent areas
    • Excessive thickness increasing production cost

    How to Select a Suitable PET Thickness

    • Consider the product dimensions and weight
    • Match the thickness to the box structure
    • Check whether the box will stand or hang
    • Consider the size of transparent panels
    • Confirm the required bottom strength
    • Test the actual material before production
    • Avoid using excessive thickness without a clear benefit
    • Approve folding quality with a physical sample

    For more detailed guidance, read our PET packaging box thickness guide.

    Importance of Creasing Pressure and Machine Settings

    Creasing pressure and machine settings must be adjusted according to the PET grade, sheet thickness, crease direction, box structure, and required folding angle.

    If the pressure is too low, the crease may be too shallow and the panel may spring back or resist folding. If the pressure is too high, the crease area may turn white, become distorted, or crack during assembly.

    Consistent machine settings are especially important for boxes with several connected folds, small locking tabs, hanger holes, or strong bottom structures. A small error in crease position or depth can affect the way the entire box closes.

    Before mass production, the manufacturer should test the actual production material, confirm the folding direction, inspect several samples, and adjust the machine until the crease appearance and folding performance are stable.

    Machine Settings That Affect PET Folding

    • Creasing pressure
    • Crease width and depth
    • Position of the crease line
    • Cutting and creasing alignment
    • Folding direction
    • Machine speed
    • Material feeding accuracy
    • Condition of creasing tools
    • Workshop temperature
    • Consistency between production batches

    Production Checks Before Mass Creasing

    • Confirm the correct PET grade and thickness
    • Test the crease on actual production material
    • Fold the sample in the intended direction
    • Inspect for whitening, cracking, and spring-back
    • Check whether tabs and flaps lock correctly
    • Confirm corner and cutout positions
    • Compare several samples for consistency
    • Record the approved machine settings

    To understand where creasing fits into production, read our custom PET packaging box manufacturing process guide.

    Protective Film and Anti-Scratch Handling

    Protective film can help reduce scratches, fingerprints, dust, and friction marks during cutting, creasing, printing, folding, packing, and transportation.

    However, protective film must be selected and applied correctly. Film with excessive adhesion may leave residue or become difficult to remove, while film with insufficient adhesion may peel away during production and stop protecting the PET surface.

    The film should also be checked before printing, gluing, or folding because some processes require the protective layer to be removed from specific areas. If the film remains in the wrong position, it may affect ink adhesion, glue bonding, or final box assembly.

    Even when protective film is used, careful handling is still necessary. PET sheets and finished boxes should be lifted rather than dragged, stacked evenly, and kept away from dust, sharp tools, rough tables, and excessive carton pressure.

    Protective Film Checks

    • Confirm whether one-side or two-side film is required
    • Check film adhesion before production
    • Confirm whether the film leaves residue
    • Remove film from printing or gluing areas when necessary
    • Keep exposed PET surfaces clean
    • Prevent film edges from peeling during handling
    • Confirm when the buyer should remove the film
    • Inspect the PET surface after film removal

    Anti-Scratch Handling Practices

    • Use clean gloves during final inspection
    • Lift PET parts instead of dragging them
    • Keep worktables free from dust and metal particles
    • Use smooth trays, separators, or clean paper
    • Avoid stacking excessive weight on finished boxes
    • Pack boxes tightly enough to prevent movement
    • Add internal protection inside shipping cartons
    • Keep finished products away from sharp tools and rough surfaces

    Printing Damage and Surface Defects

    Printing can create additional surface defects if the PET material, ink, curing method, or handling process is not controlled correctly.

    Common problems include ink scratching, peeling, smudging, uneven coverage, pinholes, poor adhesion, color variation, and visible marks around printed areas. These defects may become more noticeable on transparent PET because light passes through the material and highlights differences in ink density.

    Poor adhesion may occur when the PET surface is contaminated by dust, oil, fingerprints, protective-film residue, or unsuitable surface treatment. Ink may also be damaged if the boxes are stacked, folded, or packed before the printed layer is fully cured.

    The printing process should therefore be tested on the actual PET grade and thickness. Printed samples should be checked after folding, rubbing, stacking, and normal handling rather than only immediately after printing.

    Common Printing-Related Defects

    • Ink scratching or peeling
    • Smudged or incompletely cured ink
    • Uneven color coverage
    • Pinholes or missing printed areas
    • Poor adhesion near crease lines
    • Color differences between production batches
    • White ink showing through incorrectly
    • Printing damaged during folding
    • Fingerprints, dust, or surface contamination

    How to Reduce Printing Damage

    • Clean the PET surface before printing
    • Use ink suitable for PET material
    • Confirm any required surface treatment
    • Allow the ink to cure completely
    • Test adhesion before mass production
    • Avoid folding directly through critical printed areas
    • Protect printed surfaces during stacking
    • Inspect colors and adhesion on printed samples
    • Test the finished box under normal handling conditions

    For more information about suitable processes, compare our PET packaging printing methods.

    Packing and Transportation Protection

    Packing quality is important because PET boxes can still become scratched, bent, compressed, or deformed after production if they are not protected correctly during storage and transportation.

    Most folding PET boxes are shipped flat to reduce carton volume and transportation cost. However, flat-packed boxes must be stacked evenly and protected from excessive pressure, moisture, dust, sharp objects, and movement inside the carton.

    If the cartons are packed too loosely, the boxes may slide and rub against each other. If they are packed too tightly or stacked under excessive weight, crease lines, tabs, corners, or transparent panels may become distorted.

    Printed boxes require additional care because friction, pressure, and heat can damage ink layers or transfer marks between surfaces. Suitable separators, inner bags, carton liners, and stable carton packing can reduce these risks.

    Common Transportation Damage

    • Surface scratches caused by movement inside cartons
    • Bent corners or locking tabs
    • Compressed transparent panels
    • Distorted crease lines
    • Ink rubbing or transfer marks
    • Dust entering unprotected packages
    • Moisture affecting cartons and packing materials
    • Damage caused by sharp objects
    • Excessive pallet or carton stacking pressure

    How to Protect PET Boxes During Shipping

    • Ship folding boxes flat when the structure allows
    • Stack all pieces in the same direction
    • Use clean inner bags or protective wrapping
    • Add separators for printed or sensitive surfaces
    • Fill empty carton space to prevent movement
    • Avoid excessive pressure inside cartons
    • Use suitable carton strength for the shipment
    • Keep cartons dry and away from sharp objects
    • Confirm pallet stacking limits when required
    • Inspect carton condition before shipment

    Quality Inspection Before Shipment

    Final inspection should confirm that the PET packaging boxes match the approved sample, artwork, dimensions, material thickness, structure, and packing requirements.

    Inspection should not focus only on visible appearance. The boxes should also be folded and assembled to confirm that the panels align correctly, tabs lock securely, glue areas hold properly, and the finished structure fits the intended product.

    Transparent PET surfaces should be checked under suitable lighting because scratches, dust, fingerprints, whitening, and printing defects may be difficult to notice under weak light.

    Inspection samples should be taken from different parts of the production batch. This helps identify inconsistent creasing, printing, cutting, gluing, or packing problems before the goods are shipped.

    PET Box Quality Inspection Checklist

    • Correct PET grade and thickness
    • Accurate box dimensions
    • Clean and transparent surfaces
    • No serious scratches or fingerprints
    • No cracks along crease lines
    • Acceptable white crease appearance
    • Accurate cutting and crease positions
    • Tabs and flaps locking correctly
    • Stable glue bonding
    • Correct printing colors and position
    • No ink scratching, peeling, or smudging
    • Correct quantity and packing method
    • Cartons free from compression or moisture damage

    Functional Checks

    • Fold and assemble several boxes
    • Insert the actual product or approved sample
    • Check whether the product moves excessively
    • Confirm that the bottom supports the product weight
    • Open and close the box several times
    • Check hanger tabs or display holes when applicable
    • Confirm that inserts and accessories fit correctly
    • Compare the finished box with the approved sample
    PET packaging box quality inspection before shipment

    Questions Buyers Should Confirm Before Production

    Before approving mass production, buyers should confirm the material, structure, printing, folding quality, protective requirements, and final packing method. A clear approval standard helps prevent disputes about scratches, white crease marks, printing appearance, or normal fold lines.

    • What PET grade and thickness will be used?
    • Has the final box structure been tested with the actual product?
    • Is the crease appearance acceptable?
    • Are slight white fold lines considered acceptable?
    • Has the printing adhesion been tested?
    • Is protective film required?
    • Will the boxes be shipped flat or pre-assembled?
    • What packing method will protect the surfaces?
    • Has a final physical sample been approved?
    • What inspection standard will be used before shipment?

    Frequently Asked Questions

    Are white crease marks always a quality defect?

    Not always. A slight visible fold line may be normal on clear PET, especially at sharp folds. Severe whitening, cracking, distortion, or loss of transparency usually indicates that the crease design, PET thickness, folding direction, or machine settings should be adjusted.

    Can scratches be completely avoided on clear PET boxes?

    Minor surface marks can be difficult to eliminate completely because clear PET shows defects easily under strong light. However, protective film, clean handling, suitable packing, and careful inspection can greatly reduce visible scratches.

    Why does PET crack more easily in cold weather?

    PET may become less flexible at low temperatures. Cold material can resist folding and develop cracks or stronger white crease marks. Allowing the sheets to reach room temperature before folding can reduce this risk.

    Should a physical sample be approved before production?

    Yes. A physical sample allows the buyer to confirm product fit, box structure, folding direction, crease appearance, transparency, printing, and assembly before mass production.

    Need Help Solving PET Packaging Box Quality Problems?

    PET packaging box quality problems can often be reduced by selecting the correct material thickness, crease design, box structure, printing method, protective film, and packing process.

    Send us your product dimensions, weight, box structure, printing requirements, photos, and expected order quantity. If you already have a sample or dieline, include it for review.

    Our team can evaluate the design, prepare a suitable dieline, produce samples, and recommend practical adjustments before mass production.